

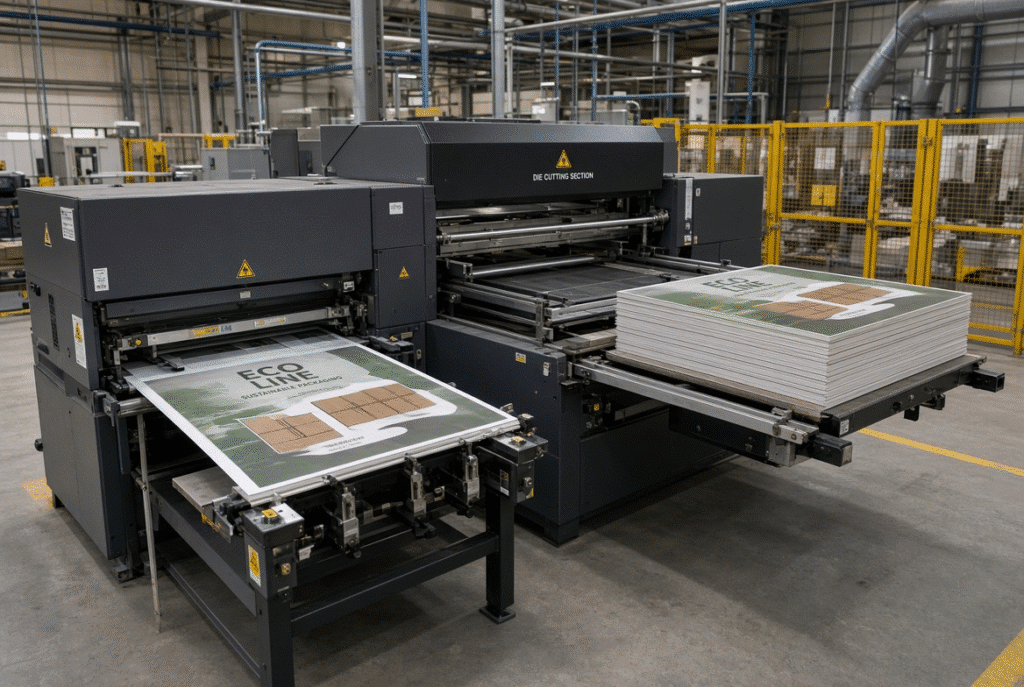
Control of the printed face, sheet positioning, flute structure and machine pressure is required simultaneously in Litho-laminated corrugated board die cutting. Just a clean cut isn’t enough. The process should preserve the strength of the boards, ensure proper alignment of artwork with the die, and provide a flat usable blank while at the same time preserving the lithographic surface.
The risks are due to the combination of face sheet, lamination bond, corrugated base, warp, feeder contact, gauges and die condition / delivery handling. If any of these factors are not controlled, scratches, face-sheet lifting, misregistration of the print-to-die, crushed flutes, weak creases, curl and poor waste removal may occur. Even though it is possible to purchase a corrugated-board machine with a rating, actual material testing is more reliable than assuming that such a rating will apply to all litho-laminated material.
What Is Litho-Laminated Corrugated Board?
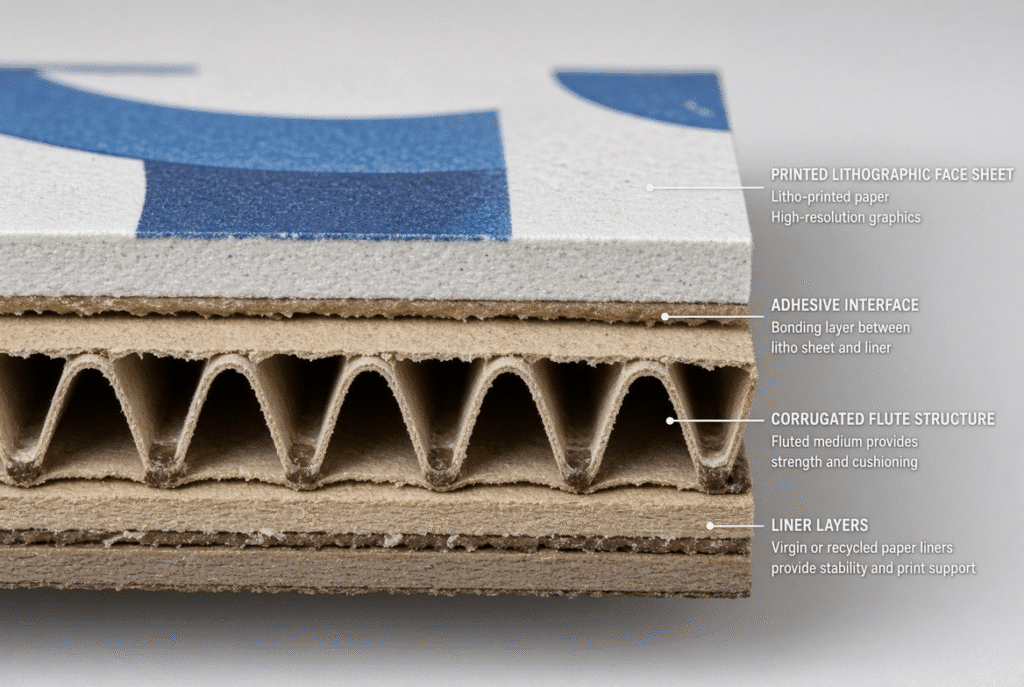
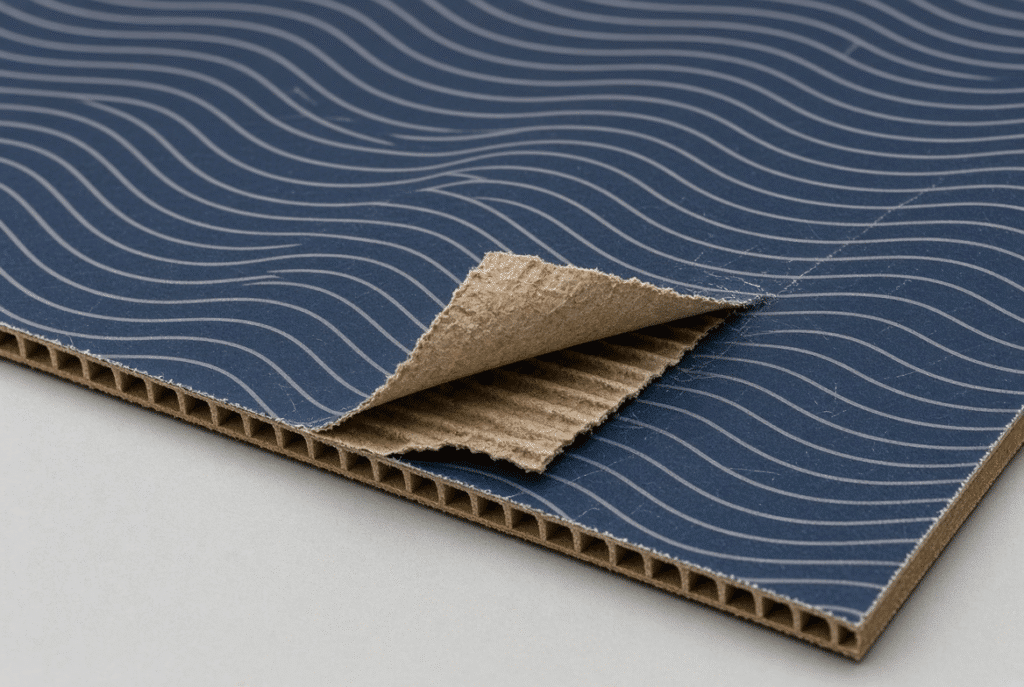
Litho-laminated corrugated board is a sheet of corrugated base paper that has been printed on the reverse side with lithographic printing. The face sheet provides high quality graphics and surface appearance. The corrugated structure provides the stiffness, cushioning and stacking strength. The combination is popular in high-quality retail packaging, as well as point-of-sale, promotional and gift packaging, and large format cartons where aesthetics and performance are important.
The Printed Face Sheet
Process inks, varnish, aqueous and/or UV coating, metallic effects or other surface treatment may be used on the face sheet. These finishes affect the appearance and also sensitivity to contact. Pressure marks, scratches, scuffing, and ink transfer and gloss changes are not usually caused by the die; rather, they originate at feed wheels, guides, transfer points or the delivery stack.
The Adhesive or Lamination Interface
Bonding layer holds the face sheet to the corrugated base. Flatness can be compromised by uneven adhesive application, poor bonding areas, bubbles, wrinkles and residual tension. These can lead to poor feeding behaviour, registration stability and response to the die pressure. If the lamination is not stable, it is not possible to improve it by pushing harder on the cutting pressure.
The Corrugated Base
Flute type, grades of liners, thickness of the board, stiffness of the board and the total weight are factors that affect sheet travel through the machine and the response to cutting and creasing pressure. Single wall and double wall constructions have different characteristics and have to be assessed on a case-by-case basis based on their actual thickness and construction.
Inspect Litho-Laminated Board Before Die Cutting
Prior to changing feeder, gauge or die settings, material condition should be verified. If the defects are not identified first, process problems will occur if they are present on the stack.
Inspect the Printed Surface
Inspect for scratches, scrubbing, ink transfer, uneven coating, defects in the varnish, bubbles, wrinkles, lifting film, adhesive marks, surface contamination. Marks found at the same position on each sheet of paper are likely to be a fixed contact point; marks found before the sheet is in the machine are likely to be from the printing/lamination stage.
Check Lamination Bond and Face-Sheet Position
Examine edges for separation or lifting. Look for bubbles, wrinkles, misalignment of the printed sheet from the corrugated base, and bonding issues. An unstable lamination bond can’t be compensated for by die-cutting pressure.
Check Flatness, Warp and Curl
Sheet separation, feed-wheel contact, guide behaviour, front- and side-gauge positioning, die entry and delivery stacking are all affected by bowing, waving, wrinkling, edge curl, crushed corners, local delamination and thickness variation.
Confirm Dimensions and Squareness
Measure length, width, thickness, straight edges and square corners. Verify flute construction and location of printed registration marks. When the machine is set up correctly, but the trimming is inconsistent or the face-sheet is not correctly placed, this will be identified as machine registration error.
Inspect Multiple Samples from the Stack
One good sheet doesn’t count as a batch. Samples should be taken from the top, middle and bottom of the stack to compare surface condition, flatness, dimensions and lamination position.
Feed Litho-Laminated Board Without Damaging the Surface
The continuous feeding must be done with controlled touching between the feeder and the sheet. The aim is to separate and transport reliably without any superfluous rubbing or local pressure which would print the face.
Lead Edge Feeding and Front-Edge Control
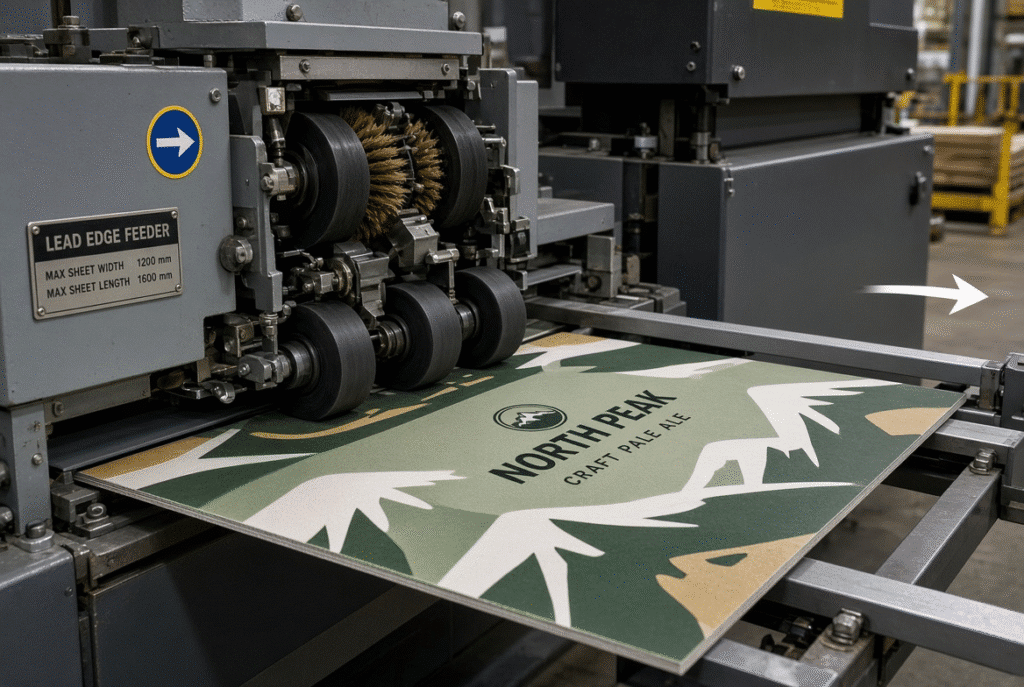
A lead-edge feeder holds and moves the front edge of the sheet to the positioning and die-cut sections. The results depend on the condition of the feed wheel, the contact pressure, the quality of the wheel’s lead edges, the support of the sheet, the alignment of the guides, the timing and speed of the sensor, etc. While the feed can be improved, with thick or more rigid board, the use of lead edge feed does not ensure that a mark will not be left on all surface finishes.
Feed-Wheel Pressure and Alignment
Lack of pressure causes slipping, skew or missed feeds. Face-sheet marks, local compression, edge damage or skew are caused by excess pressure. Start with the manufacturer’s suggested setting, and conduct a few test sheets, adjusting one variable at a time.
Guides, Belts and Support Surfaces
Guides and/or support surfaces should be arranged so that the sheet is always driven forward and not sideways or against the printing side. All of the above gives impression: rough edges, debris, adhesive residue, too much guide pressure, gaps and sudden height changes at transition points.
Protecting the Printed Face During Transport
Surface protection is based on the entire contact path. A clean feeder can be followed by a contaminated belt, poorly adjusted transfer and/or damaging delivery system. Test on several test sheets prior to full production, the same contact areas.
Maintain Print-to-Die Registration
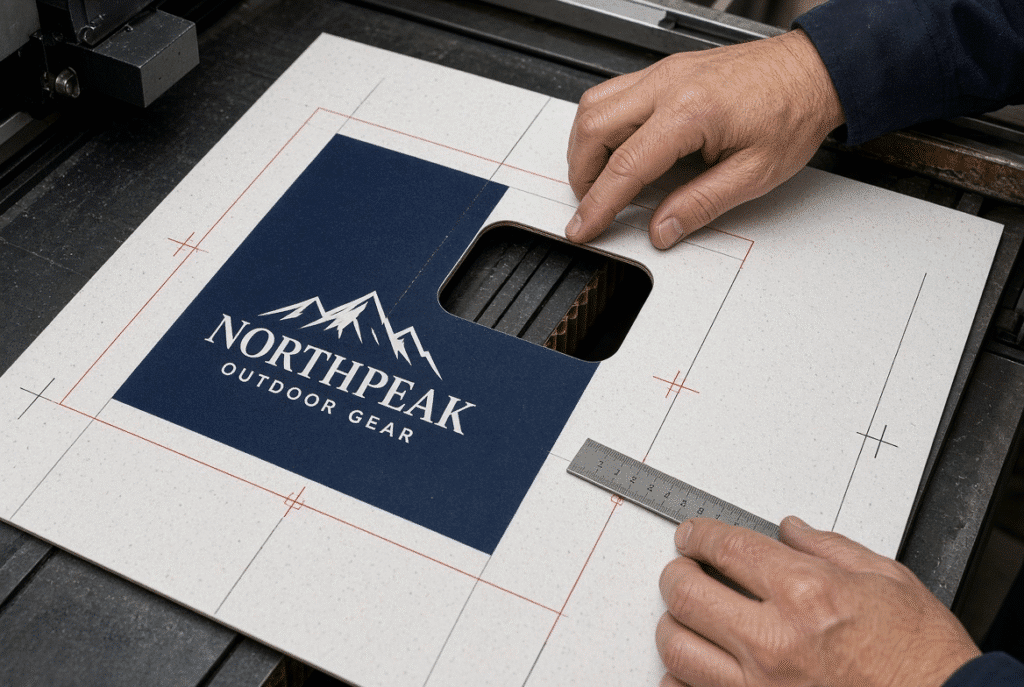
Print-to-die registration is the registration between the printed artwork and the layout for cutting and/or creasing. Depends on the accuracy of the print, lamination stability, board size, board flatness, feeding consistency, gauge settings, machine timing, and die alignment.
Control Lead-Edge Arrival
The first requirement is to have a straight, steady lead edge. The sheet will move before reaching the front gauge if the front-edge curl is not flat, the wheels do not have good contact with the sheet, or the sheet is not supported adequately, or the feed pitch is incorrect or there are timing errors. This variation is particularly harmful on windows, handles, slots, borders and crease lines.
Adjust Front and Side Gauges
Gauges are used on the front and side to set the reference position of the sheet. The sheets need to be checked for gauge pressure, parallelism, edge condition and sheet format. What works for one size of sheet or thickness of a board, might not work for another.
Check for Sheet Skew
The lack of uniform contact, misaligned guides, board warp, edge curl, side-gauge pressure and uniform support can cause the sheet to rotate prior to die cutting. Check front and side edges, printed registration marks and finished die-cut on subsequent sheets.
Separate Feeding Variation from Print or Lamination Variation
The print in the design can already differ with respect to the edge of the sheet, or the face sheet can have moved during lamination. Before changing the machine settings, make sure to compare the printed marks, edges on the sheet, position of the lamination, the position of the die-cut features and several samples.
Die-Cutting and Creasing Pressure for Litho-Laminated Board
When cutting and creasing the board for the die-cutting part, the printed face and the corrugated board should not be damaged in any way. The pressure is influenced by die condition, rule height, make-ready, counterplate, board thickness, flutes and machine parallelism.
Start with Controlled Die Pressure
Start with the manufacturer’s set-up instructions and then add pressure to the machine slowly. The trial should validate complete cutting, clean creasing, a suitable waste separation, no deformation of the face and no unnecessary crushing of the flute and suitable folding behaviour.
Signs of Overpressure
These include surface dents, pressure lines, flattened flutes, crushed creases, loss of board stiffness, folding issues, face-sheet deformation and excessive machine load. If the pressure is increased further, any other issues with the die, make ready, counterplate thickness or board thickness will become apparent.
Signs of Underpressure
Underpressure is present if cuts are incomplete, corners are not cut, creases are weak, waste is not removed, and there is variation in the sheet. Check die condition and pressure distribution before just turning up the pressure.
Die Condition and Make-Ready
Defects caused by worn cutting rules, damaged creasing rules, an improperly set rule height, loose parts, uneven make-ready or a die that is oriented the wrong way are not correctable by pressure. Check the complete die setting up including centre and edge areas of large format sheets.
Common Litho-Laminated Board Die-Cutting Defects
There can be more than one cause for each defect. The first mark and the pattern can show which section of the machine is responsible for the mark.
Scratches, Scuffs and Pressure Marks
Common sources include dirty/worn feed wheels, rough guides, contaminated belts, excessive pressure, and sheet-to-sheet rubbing and delivery components. A mark on the same position on successive sheets is a fixed contact point.
Print-to-Die Misregistration
The relationship between artwork and die may change due to sheet skew, board warp, improper gauge setting, lamination movement, artwork variation, sheet size variation, machine timing and die alignment. If the offset is consistent, the setting is incorrect, if the offset is random, there is instability in the material or feeding.
Face-Sheet Lifting or Lamination Failure
Lifting or separation can occur due to weak bonding, edge damage, curl, pressure or improper handling. The application of extra die pressure is not a cure for inadequate lamination bond.
Crushed Flutes and Damaged Creases
Flutes are crushed or creases are damaged due to overpressure, wrong make ready, unsuitable rules, variation of board thickness, and parallelism of the machine. These faults decrease good fold quality and finished package strength.
Incomplete Cuts and Poor Waste Removal
Insufficient pressure, worn cutting rules, uneven pressure distribution, die-setup errors and board structure can result in incomplete cuts. If cutting is not complete, manual sorting and stripping will be needed and increase the time required.
Curl and Delivery-Stack Damage
Curl and stack damage can be caused by lamination tension, moisture variation, pressure imbalance, sheet drop height, blower settings, side-jogger pressure and rubbing of the sheets together. The quality of the delivery directly influences the quality of the packages in the final assembly and gluing process, along with folding.
Practical Setup Procedure for Litho-Laminated Board
A controlled process prior to full operation decreases the chances of having a large batch of non-conforming products.
Prepare the Material and Stack
Check face sheets, edge condition and dimensions, and lamination bond. Correct alignment of the stack, removing severely damaged sheets and permitting the board to condition if moisture or temperature differences exist. Feeders and pressure adjustments are made after material preparation.
Clean and Inspect the Machine
Clean feed wheels, belts, guides, support surfaces, sensors, front and side gauges, die surfaces and make-ready/delivery components. Clean up paper dust, ink residue and glue. Replace and adjust worn parts. Repeated marks are common and often due to contamination.
Set Feeding and Positioning
Verify the orientation, cutting and creasing rules, make-ready and counterplate. Apply initial pressure, distribute on paper sheet and verify the removal of waste. Check both centre and edge areas.
Set the Die and Pressure
Do a small-scale run at protective speed. Check surface condition, print-to-die registration, cuts, crease condition, flute condition, curl and waste separation and stacking. Only increase speed once stable performance has been verified.
Run a Controlled Trial
The first approved sample is not acceptable. These surface marks, registration drift, adhesive build-up, component wear or board variation may occur later in the run.
Monitor Quality During Continuous Production
The first approved sample is not sufficient. Surface marks, registration drift, adhesive build-up, component wear and board variation can appear later in the run.
Inspect the Printed Surface
Inspect at regular and scheduled intervals on the face sheet, on feed-wheel contact areas, lead edge, side edges, die-cut areas and delivery stack. Random marks are likely to be debris or unstable sheets or sheet-to-sheet rubbing, while repeated marks generally suggest a contact point.
Check Registration and Finished Features
Print registration marks, windows, handles, slots, crease lines and margins – compare them from print to print – not just approve the first output.
Monitor Cutting, Creasing and Waste
Checking the completeness, crease quality, separation of waste and finished-blank flatness should be made together. Cutting could go well with a sheet but it may fail while folding it or during assembly.
Know When to Slow Down or Stop
If surface marks, registration movement, lifting of face-sheet, crushed flutes, repeated jams, incomplete cuts, weak creases, rising curl or other unusual machine noises are seen, it is an early warning to intervene.
Selecting and Testing a Flatbed Die Cutter for Litho-Laminated Board
Pressure or speed values are not sufficient for determining suitability in nominal format. The machine must be assessed with the real board and job profile.
Prepare a Complete Material and Job Profile
Note minimum and maximum sheet sizes, board thickness, flute type, single or double wall construction, face sheet material, lamination type, surface finish, typical warps, die cutting size, registration target, target speed, daily volumes and cutting/creasing requirements.
Request a Test with Representative Material
Utilize real or representative litho-laminated board, printed surfaces, sheet sizes, typical warp and real or similar and comparable dies. The test should measure the feeding stability, surface protection, print-to-die registration, cutting, creasing, removal of waste, curl, delivery stacking, and the number of operator adjustments needed.
Questions to Ask Machine Suppliers
- What are the grades of litho-laminated boards that have been tested?
- What parts touch the printed image?
- How is surface mark minimised?
- Which thicknesses and flute types are allowed?
- What happens when there is a moderate amount of warp in the feeder?
- How is the control of front and side position regulated?
- What pressure and make-ready changes can be made?
- During testing, what was the constant speed reached?
- What training and installation does it provide?
- What parts and servicing is available?
Reference the DAIS D1060Y Naturally
The DAIS D1060Y is a lead-edge feeding flatbed die cutting machine for sheet-fed paperboard and corrugated-board applications. The suitability for any particular litho-laminated board has yet to be determined via representative material testing and final machine configuration review.
Frequently Asked Questions About Litho-Laminated Board Die Cutting
What is litho-laminated corrugated board?
It is corrugated board to which a lithographic sheet is applied. The face sheet offers high quality graphics and the corrugated structure offers stiffness, cushioning and stacking strength.
Why is litho-laminated board difficult to die cut?
There are additional process variables with face sheet/adhesive interface/liners/fluting/surface finish/warp/feeding contact/pressure and registration compared to ordinary printed corrugated board.
How can I protect the printed face during die cutting?
Ensure all contact components are kept clean, adjust the feed-wheel pressure, ensure the guides are aligned and ensure there is adequate sheet support, apply controlled die pressure and monitor the sheet path during the run.
What causes print-to-die misregistration?
It can be caused by sheet skew, board warp, wrong gauge settings, lamination movement, printing variation, differences in sheet size, machine timing and alignment of the dies. Random variation and offset suggest different sources of variation.
Can a lead edge feeder process litho-laminated board?
Can be appropriate where the feeder, support path, positioning system and general machine configuration are compatible with the board. The only way to be certain is to test a sample of the actual material.
What causes crushed flutes?
The most common causes are excessive pressure, improper make-ready, improper cutting or creasing rules, board thickness variation and poor machine parallelism.
How can I reduce curl after die cutting?
Discuss board conditioning, lamination balance, material flatness, pressure distribution, die setup and handling. There is no single machine setting that will fix all source of curl.
What should I provide for a machine test?
Information on actual or representative board and face-sheet details, flute type, thickness, sheet size, typical warp, print layout, die requirements, target speed, target and surface-quality criteria.
Summary Guidance – Control the Material, Machine and Finished Sheet
Litho-laminated corrugated board die cutting is successful when the face sheet, lamination bond, corrugated structure, positioning system, die, pressure and delivery are considered as one process. Examine material and bond between material first. Inspect for flatness, size and edge quality. Maintain cleanliness of contact components. Maintain a controlled feeder pressure. Double check positioning in front and side. Gradually set the cutting and creasing pressure. Check out die and make ready. Keep an eye on the surface, registration and delivery throughout the run. Test representatively until full production and record settings and defects for repeat jobs.
The DAIS engineering team can examine your board samples, sheet size, flute design, face-sheet information and quality objectives to see if the D1060Y flatbed die cutting machine configuration with the flatbed lead-edge feeding mechanism is suitable for your production needs, if you are considering a flatbed die cutter for litho-laminated packaging.