

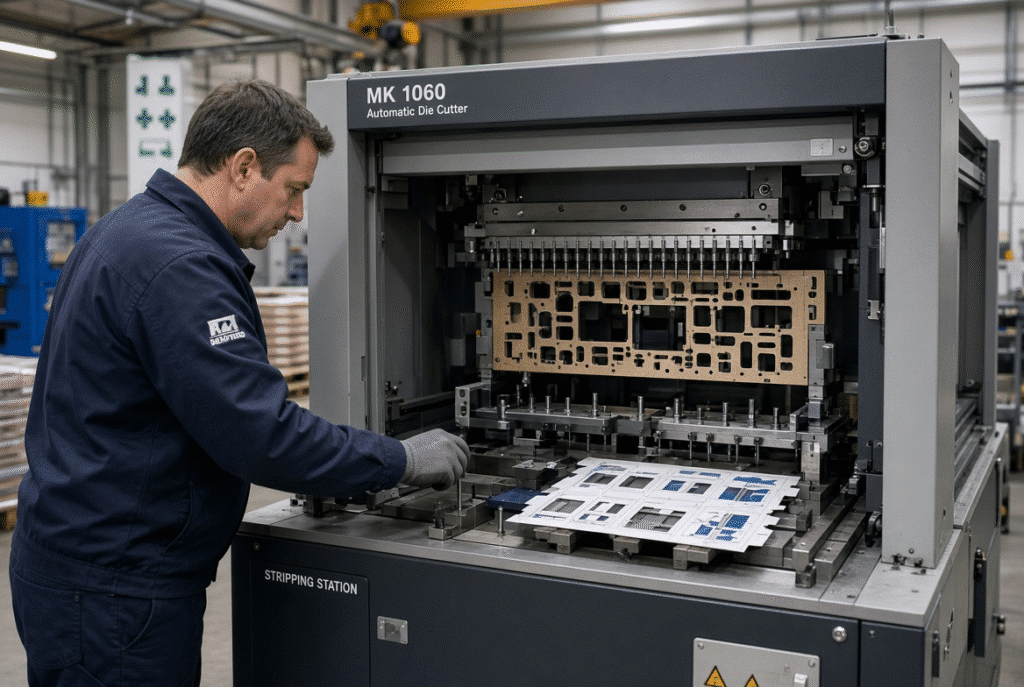
The carton layout comes before the pins when it comes to setting up a stripping station on an automatic flatbed die cutter. Stable waste removal occurs when the team first reviews the imposed sheet, the dieline, the internal and perimeter wastes, the gripper edge, material type and the actual output condition after stripping. Only after the plan is clear, should the upper and lower tools be prepared.
One common problem is that people put pins in all the waste areas, just hoping for clean results. The more pins, the better the stripping does not necessarily mean the more pins. All of these components must cooperate to direct waste along a controlled path, shield finished blanks from the waste and provide stability for the sheet.
Safety note: Only trained personnel should be involved in setting up the stripping station with the machine shut, isolated and secured following the manufacturer’s operating manual, site lockout/tagout procedures and applicable safety requirements. This article is intended to give you a general production-planning guideline, and should not be used in place of machine-specific training or tooling instructions.
Understand the Stripping Job Before Preparing the Tools
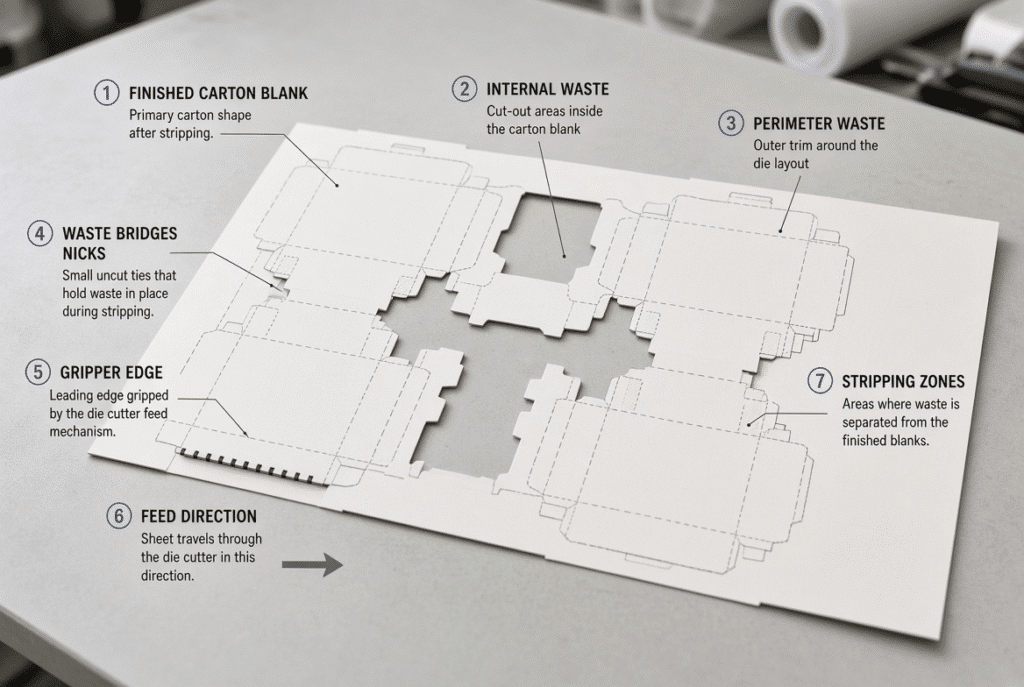
All stripping setups begin with a review of the job. The operator, die maker and production team must determine what is considered waste, what is a completed carton blank, what should remain intact for sheet support or subsequent processing and what is the desired condition of the sheet when it leaves the stripping station. This review eliminates: building tools from a drawing that differs from the actual imposed sheet, removal of supporting material before the sheet has been removed, and neglecting to consider the gripper edge and delivery direction.
Review the Carton Dieline and Imposed Sheet Layout
Review dieline for internal holes, windows, locking slots, perimeter waste, carton-to-carton spacing, waste bridges, nicks, gripper edge and feed direction. Make a note of places where completed cartons need to be joined. A normal folding carton sheet will contain several blanks, show windows, hang holes and surrounding skeleton waste. The team needs to determine the waste to be removed at the stripping station and the material to remain for subsequent sheet movement or blanking.
Confirm Material, Die-Cut Quality, and Required Output Condition
Behavioral approach to stripping varies according to substrate. The cleanliness of waste release and ease of marking of carton edges and/or print surfaces depends on the board grade, thickness, coating, stiffness, print surface, and static tendency, as well as the quality of the die cut. Specify the output prior to the development of the tools: Cleaned sheet, semi stripped sheet, fully stripped blanks which are still joined together, or blanks ready to be blanked separately. So that is the decision that determines the rest of this tool strategy.
Prepare the Core Stripping Tool Components
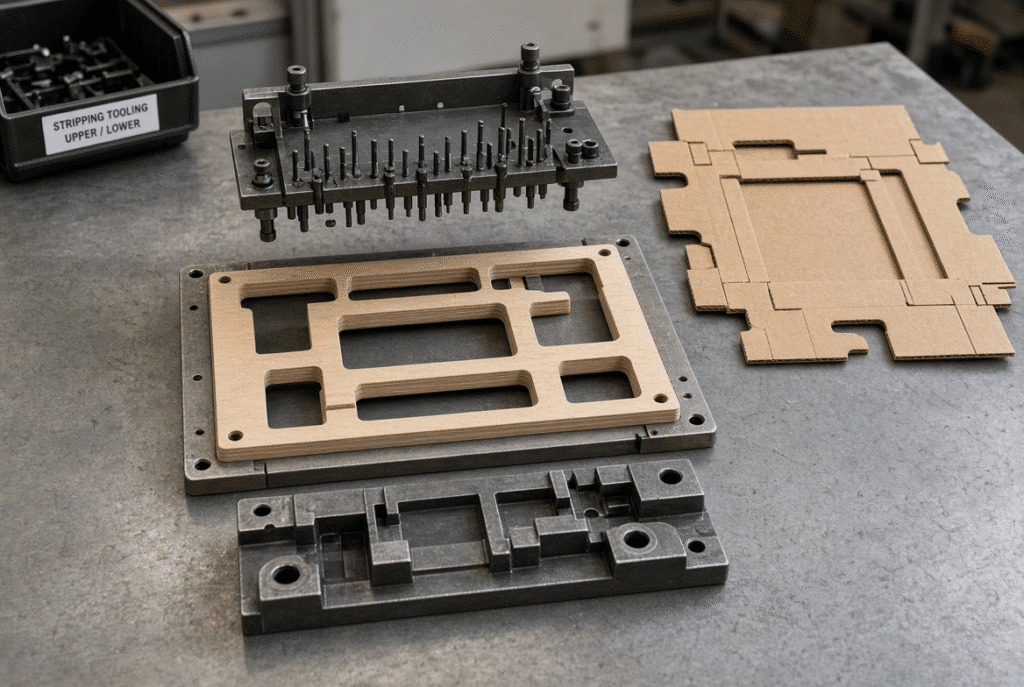
In a typical stripping station, components that are job specific are arranged around the waste removal plan. They can be a central stripping board, upper stripping tool, lower stripping tool, pins, pin holders, stripping rules, support blocks, foam or sponge support, and frames. Tooling varies with machine and supplier, with some that are based on dynamic stripping concepts, and others are based on large lower pin layouts. The article below outlines the role of each component and doesn’t advocate for any one system as the proper way.
Central Stripping Board and Waste Openings
The central stripping board establishes openings to align with waste areas to be removed. It establishes the path for waste and knits the sheet together, while acting as a barrier to areas which should not be disturbed. It’s crucial to get the board ready. When an opening is not aligned with the actual waste geometry, it can cause the waste to hang, finished containers to lose support, or a tool to hit an unexpected surface.
Upper Stripping Tool: Pins, Rules, and Sheet Support
The top tool applies controlled contact to the targeted areas of waste. It can employ pins or stripping rules, support blocks or a combination of the above. The sheet is sometimes supported by foam, sponge or other material before pushing the waste through. Placement should be consistent with the waste structure and clear of finished carton edges, crease lines, print sensitive areas and fragile features.
Lower Stripping Tool: Clearance, Support, and Waste Exit Path
Lower tooling provides clearance, opposing support and exit path to move the waste away from the sheet. The lower pins or like parts act in opposition to the upper tool and help control release and minimize waste from remaining in the sheet travel path. The bottom tool should fit with the upper tool and the middle board. The objective is not only to send waste down into the sheet, but to send it below or away from the sheet to prevent carryover, jams or damage at delivery.
Install and Align the Upper and Lower Stripping Tools
One of the most important phases of the stripping-station set up is the alignment. The upper and lower tools should be matched to the same waste areas, have the proper clearance and waste should exit the sheet without touching finished blanks. A controlled process of verification based on the machine’s manual, approved tooling drawings and the experience of trained workers.
Position the Upper Tool According to the Actual Sheet Layout
Set the top tool on a confirmed production sheet, approved layout reference or job specific setup sheet in such a way that each pin and contact component is aligned with the desired waste. Ensure no component extends beyond the carton area, crease line, print-critical area or unsupported edge. A picture is worth a thousand words and is required for real imposed layout, which could not be determined from a tooling drawing alone.
Align Lower Pins and Supports with the Upper Tool
The lower pins and support elements need to align with the upper tooling to provide a controlled stripping action. The lower parts support or receive clearance in the appropriate place to allow the release of waste in a clean manner away from the sheet path. Aligning the upper part of the image to the lower part of the image will produce a more repeatable image and prevent waste being transferred with the image. The exact heights, the pressure and the position of the stroke are machine and tooling specific and should be taken from the relevant documentation.
Verify Clearance Around Carton Blanks and Sheet-Control Areas
Record clearance clearance around completed carton edges, internal carton cut-outs, gripper edge, perimeter waste and delivery critical areas before any trial. The goal is to avoid accidental contact, marking of the carton, crushed edges, trapping or sheet instability. Before forcing a tooling shape into production, stop and check the drawing of the tool, the carton design and the machine specific setting procedure to determine clearance.
Run a Controlled Trial Before Increasing Production Speed
Stripping setup should be proven with actual production material under controlled conditions before the machine is run at planned speed. The aim of the trial is to confirm waste release, carton protection, sheet stability and delivery condition. The procedures for all trials, speed control and safety checks must be conducted in accordance with the manufacturer’s machine manual and site procedures.
Start with Approved Machine and Safety Checks
Ensure that all tools are locked in place and guards and safety devices are secured, machine is free of loose tools and waste material and correct job settings are confirmed with approved production documentation. It is important that no safety device is to be short-circuited to monitor or make adjustments to the stripping performance. Any adjustment should be made in accordance with the safe machine setup procedure outlined by the machine.
Inspect the First Sheets for Waste Release and Carton Protection
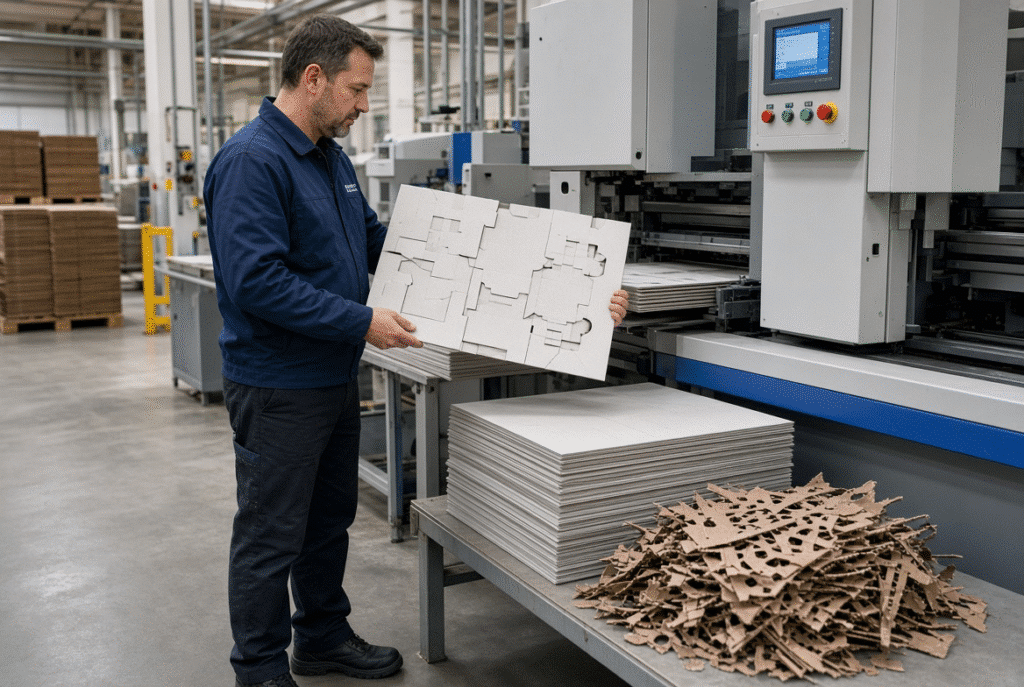
Inspect the initial trial sheets for any internal waste in holes, perimeter waste that unexpectedly sticks on the carton, shreds of waste, any damage to the edges of the carton, marks on the printed surface, creased or distorted blanks, sheet skew, and waste that enters the delivery path. Examine cartons that have been removed and also completed. If loose waste is moving through the machine, or building up in the stripping area, the machine may look clean but it is not.
Increase Output Only After Stable Results Are Confirmed
Transition to normal production conditions only after the removal of the stripping remains becomes stable at the controlled speeds in the trial and the production conforms with the agreed job requirements. In cases where stripping quality decreases at higher speeds, this isn’t necessarily due to the pin force but rather due to material variation, tool alignment, control of waste, sheet transport or die-cut quality. Keep Track Of Job Settings, Approved Tooling Photos, Inspection Observations, Material Details, etc. to enable repeat orders to be set up faster.
Common Stripping-Station Setup Problems and How to Diagnose Them
There is no single cause to stripping problems. The first step in a structured diagnosis is to verify the carton layout, check the quality of the die cuts, assess the waste path, examine upper/lower alignment, review the material and ensure that the sheet is transported. The table below is a helpful starting point, but should not be used as a substitute for machine-specific troubleshooting advice.
Troubleshooting Table: Common Symptoms and Setup Areas to Review
| Production Symptom | Possible Setup Area to Review | Other Factors to Check |
| Internal waste remains in the carton | Upper/lower tooling alignment, pin contact, central-board opening | Die-cut quality, bridge design, material stiffness, static |
| Waste breaks into fragments | Waste path, tool contact location, clearance | Waste geometry, board brittleness, cutting quality |
| Waste is carried into delivery | Lower clearance, waste exit route, stripping-board design | Sheet transport, delivery settings, loose waste accumulation |
| Carton blanks are marked or damaged | Pin location, support placement, clearance around finished areas | Board surface, coating, die-cut quality, tool alignment |
| Sheet becomes unstable after stripping | Retained support areas, perimeter-waste plan, tool interference | Gripper-edge design, sheet size, board warp, transport settings |
| Setup takes too long | Tooling documentation, pin layout, job-preparation process | Operator training, repeat-job records, tool storage and labeling |
The difficult jobs should be discussed with the die maker, die supplier, machine manufacturer and experienced process man.
Problems That Begin Before the Stripping Station
Failure to strip may stem from an earlier point in the process. Even with the proper tools installed, stripping is not always reliable because of poor die cutting, incorrect creasing, weak or excessive nicks, board warp, variation in moisture content, print coating, static or inaccurate registration. Don’t keep changing stripping pins when the problem is actually upstream. Always check the die-cut sheet before stripping and ensure that the waste pattern/structure is also appropriate for removing.
How to Prepare Better for Repeat Stripping Jobs
Repeat jobs can provide a good opportunity to reduce time setting up the plant and to maintain consistency where the plant sees a successful stripping setup as a controlled production asset, rather than creating from scratch every job.
Document the Approved Tooling Layout and Job Settings
Keep approved tooling drawings, pin layout references, photos of upper and lower tools, central board identification, material information, inspection sample and any job specific observations. These records enable an operator to have a known configuration available on subsequent orders. There can be any changes in material, new artwork or cutting die, different board grades, or any changes in machines and so on – all of this needs to be re-checked.
Store, Label, and Inspect Stripping Tools Between Jobs
Cut off boards, pins, frames, supports and similar accessories should be stored and identified by job or tooling number. Missed parts, bent pins, broken boards, incorrect tooling, and longer changeovers are the result of poor storage. Check each tool before using again – tools that have been modified, improperly stored or damaged may require maintenance or adjustment and should not be used until they are.
When to Request Technical Support for a Stripping Setup
Some professions can be reviewed prior to production. The following characteristics are generally indicative of the need for more technical input.
Jobs That Need an Application-Specific Tooling Review
- Small holes, narrow slots or closely spaced internal waste
- Complex windows, irregular perimeter waste or fine decorative cuts
- Coated, laminated, warped, or surface-sensitive board, or board that is too thick
- Considered as a high value printed carton, where you cannot accept any marks or scuffing is a question that should be asked.
- Failure to strip repeatedly or failure to strip due to loose waste, carton damage or delivery instability
- The high volume jobs where the results are required to be reliable at specific production conditions.
- Workpieces with a requirement for a certain output condition for further blanking, folding-gluing or packing.
The review shall take into account the carton dieline, imposed sheet, material sample, die cut quality, existing tooling, desired output condition, and production target.
Information to Send to a Machine or Tooling Supplier
- The layout of the carton dielines and imposed sheets.
- The various types of materials, grades of board, thickness, coating and print finish.
- The maximum and minimum sizes of the sheets.
- The direction of the feed and the requirement of the gripper edge.
- Images or videos of existing stripping issue.
- Samples of good and bad product
- The most up-to-date cutting-die and stripping-tool information available
The condition that must be satisfied at the output of the stripper following the stripping operation.
Summary Guidance – Treat Stripping Setup as a Controlled Production Process
A reliable stripping station can be achieved if the carton layout, material, die-cut quality, central stripping board, upper and lower tooling, waste route, sheet support, trial inspection and overall production process are all consistent with the requirements of the job. Take a disciplined approach: Review the dieline, prepare the tools, align the stripping components, check for clearance, run controlled trials, check waste and finished carton, release the job for normal production only when stable results are achieved.
Please submit your carton dieline, material information and existing stripping difficulty for a technical tooling review. If you are considering integrated die cutting and waste stripping, please consult with the DAIS technical team on your carton layout and production requirements with the D1060SQ Automatic Flatbed Die Cutting Machine and waste stripping.