

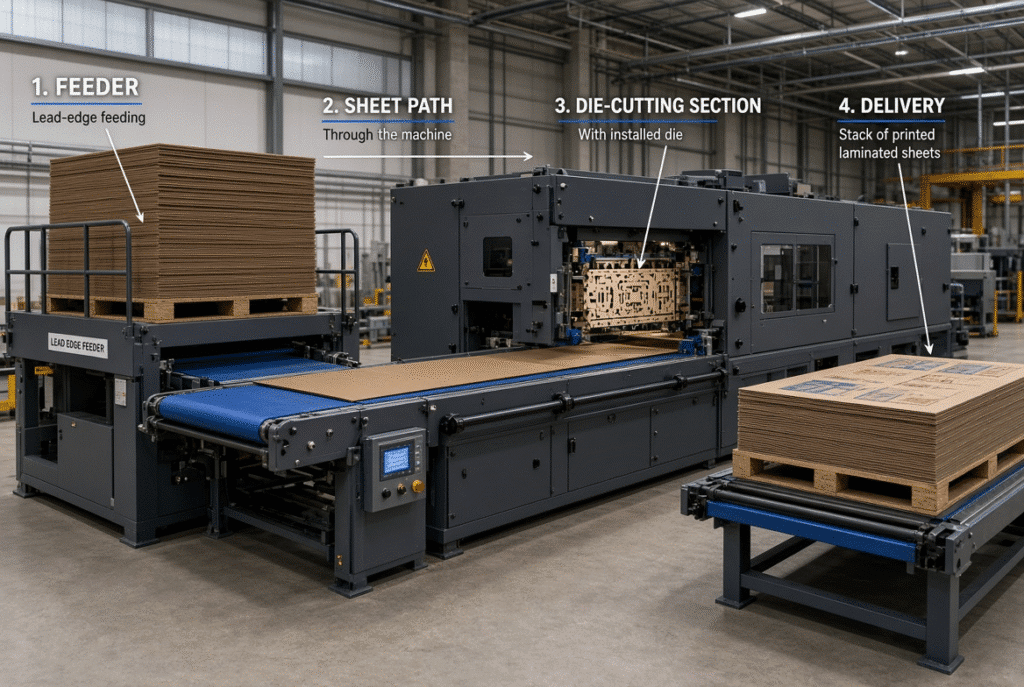
The technique for setting up a flatbed die cutter for laminated corrugated board is not a pressure adjustment, but a controlled sequence. Inspect material and die, set up stack, set feed and positioning, install and adjust die, run a low-speed trial, check for cutting and registration, and fine tune delivery. Only then approve production if you like it.
This discipline is required of laminated board. The printed face may be scratched, pressure marks may appear, the lamination may shift or lift, and pressure control may cause flute crushing of the corrugated base. One clean sheet is no sign of readiness for full production.
Safety notice
Always abide by machine manuals and site safety measures. Disconnect and stop machine before making adjustments to guarded or moving parts. Never overcome guards, interlocks, sensors or emergency stops. Only competent personnel on electrical, pneumatic, drive, control, structure or die-related tasks. Avoid contact with feeding, die-cutting, delivery devices. Only use approved tools, cleaners and lubricants.
Confirm the Job and Material Before Setup
The job profile is the starting point for setup, not the pressure dial. It is important for the operator or engineer to be aware of what will have to take place on the board, printed surface, die layout and the requirements for the finished product before any sheet goes into the machine.
Record the Board and Surface Specification
Note the thickness of the note board, type of flute, single-wall or double-wall, size of the sheet, face-sheet material, printing, coverage, coating or varnish, type of film, usual warp or curl, and sensitivity to surface effects. These details are used for feeder contact pressure, guide clearance, target for registration, die pressure, creasing depth and sheet behaviour in delivery.
Review the Die and Finished Product
Analyse die-cutting size, the cutting lines, creasing lines, windows, box handles, waste areas, gripper/lead-edge margins, folding and gluing requirements, and box or display geometry. The orientation of work sheets, registration strategy, pressure distribution and easy stripping of waste depends on the type of die layout.
Check Representative Material Samples
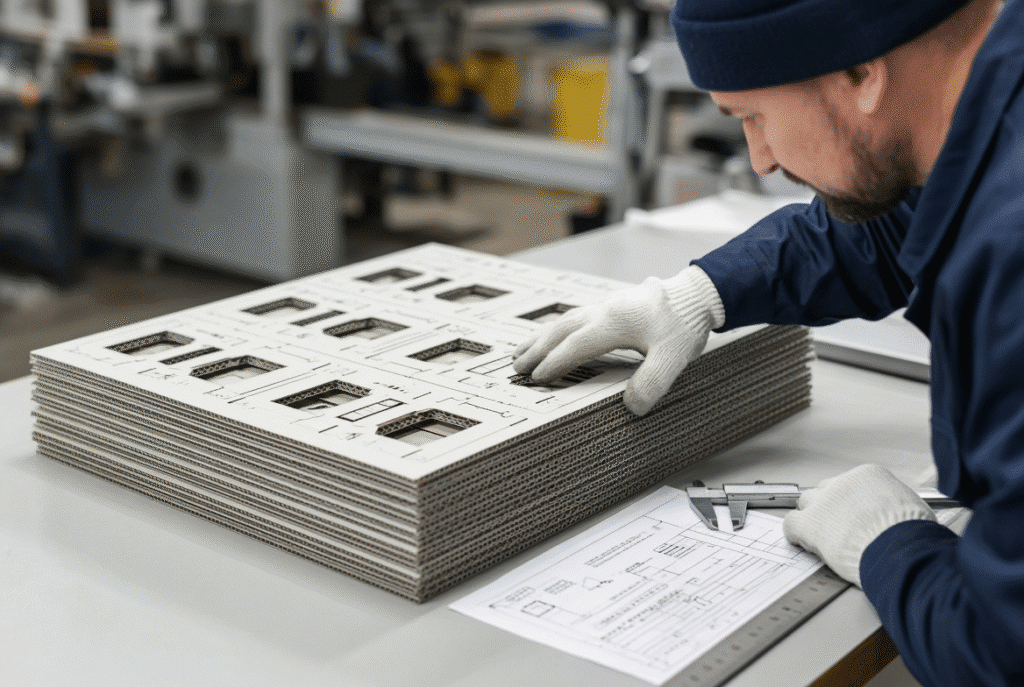
Check a number of sheets from the production lot. Inspect surface quality, lamination bond, flatness, dimensions, edge condition/squareness, and printed registration marks. A good sample from one lot is seldom the same.
Inspect and Prepare the Laminated Board
Reduced need to jam the machines later because of good material preparation.
Check the Printed Face
Inspect for scratches, scuffs, transfer of ink, film defects, bubbles, wrinkling, incomplete drying, adhesive marks, dust and film lifting. Distinguish existing defects from those that are likely to be caused by the machine.
Check the Lamination Bond
Check for face sheet lifting, separation at the edges, bubbles, wrinkles, and for any separation between the printed face and the corrugated base. A weak or unstable bond cannot be fixed by the pressure during the die making process.
Check Flatness, Warp and Edge Condition
Look for bowing, twisting, a wavy board, edge curl, crushed corners, delamination and uneven thickness. These conditions impact on sheet separation, the feed-wheel contact, the guide clearance, positioning accuracy, die entry, and delivery stacking.
Prepare the Stack
Match up the front and side edges. Maintain the same orientation for each sheet in the pile. Take out very damaged sheets. Keep the stack clean and stable and don’t over-compress warped material. Adjust the board for plant practice but don’t impose universal temperature and humidity readings.
Prepare the Feeder and Sheet Path
Any contact or support surfaces are to be clean and properly adjusted prior to changing production settings.
Clean Feed Wheels, Guides and Support Surfaces
Clean up paper dust, ink residue, adhesive, coating particles, film pieces, oil and grease. Any single contaminant can get on each page thereafter.
Inspect Feed Wheels and Brushes
Examine for wear, flatness, cracks, hardness, contamination, alignment, wheel height, brush condition and contact pressure. Slipping, double feeding, missed feeding, surface marks and skew are due to worn or dirty wheels.
Check Sensors and Detection Components
Verify cleanliness and sensor placement and verify reflection, particularly when using dark printing or high gloss. Never make electrical adjustments without professional assistance.
Check Sheet Support and Transitions
Check support tables, belts, gaps, guide clearance and handover points. A clearances that are incorrect will cause a warped or thick laminated sheet to lift or catch at any transition.
Set Feeding and Sheet Positioning
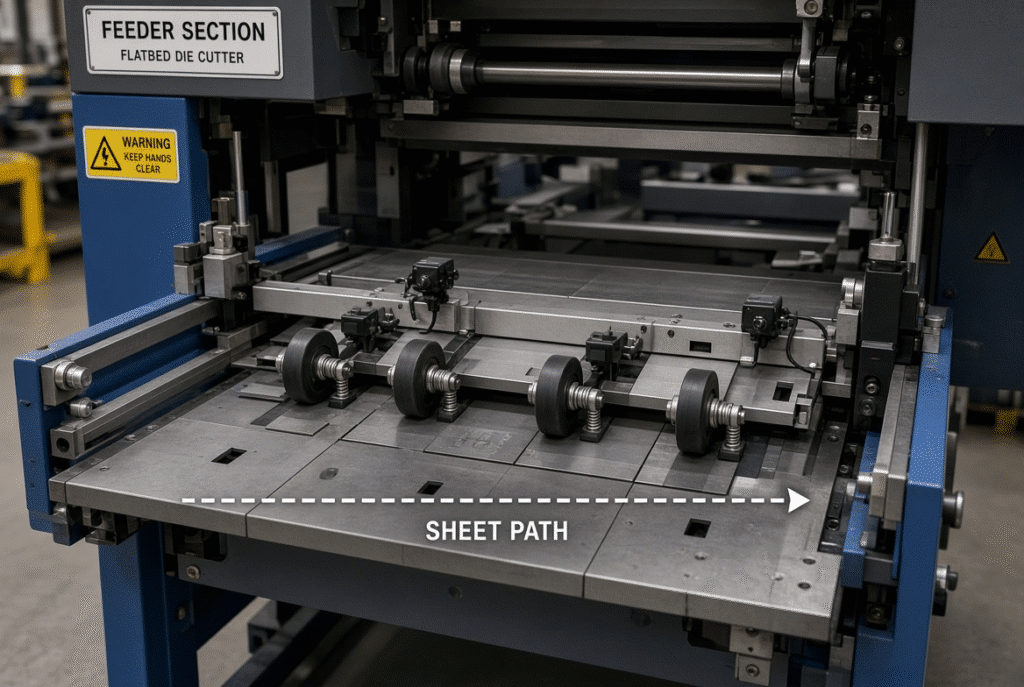
The feeder needs to reliably move the sheet and minimize unnecessary contact with the printed surface.
Adjust Feed-Wheel Pressure
If the pressure is too light, it will cause slipping, missed feeds and variation of registration. Pressure is too great if the face is puckered or the board is compressed locally or is skewed. Start with the manufacturer recommended starting point and test for one variable at a time.
Set Guide Clearance
Clearance should be the same as sheet thickness, board stiffness, edge condition, warp and format. If there is not enough clearance, the sheet will rub or be damaged, and if there is too much clearance, drift or skew.
Set Front and Side Gauges
Gauges are used to set up the sheet reference position prior to the die cutting process, both front and side gauges. Check position, parallelism, contact pressure and edge condition of several sheets not one sample.
Check Lead-Edge Arrival and Sheet Skew
A bent, uneven or broken lead edge is not consistently brought to the front gauge. Compare the features on the front edge, side edge, printed marks, and die-cut finishes on several sheets.
Confirm Feed Timing and Sheet Pitch
Confirm the sensors, the synchronisation of the machine cycles, the sheet spacing, the feeder speed and the transfer to the diecutting area. Slow feed does not assure stability of production speed.
Install and Check the Die
Check Die Installation Before any Pressure Adjustments are made.
Confirm Die Orientation
Correct direction of sheet, printed layout, front and side references, die orientation, gripper margin, waste areas, and registration marks. There is an apparent misregistration that occurs on a large scale when a simple orientation error occurs.
Inspect Cutting Rules
Inspect damaged, worn, loose, contaminated, improperly marked or uneven rules. Most often an imperfect cut is caused by a bad cut, rather than by inadequate machine pressure.
Inspect Creasing Rules and Channels
The thickness of components must be the same as that of the laminated board, the fluting must be the same, the surface must be the same, and the folding design must be the same. The cutting device doesn’t automatically yield a good cut.
Check Make-Ready and Counterplate
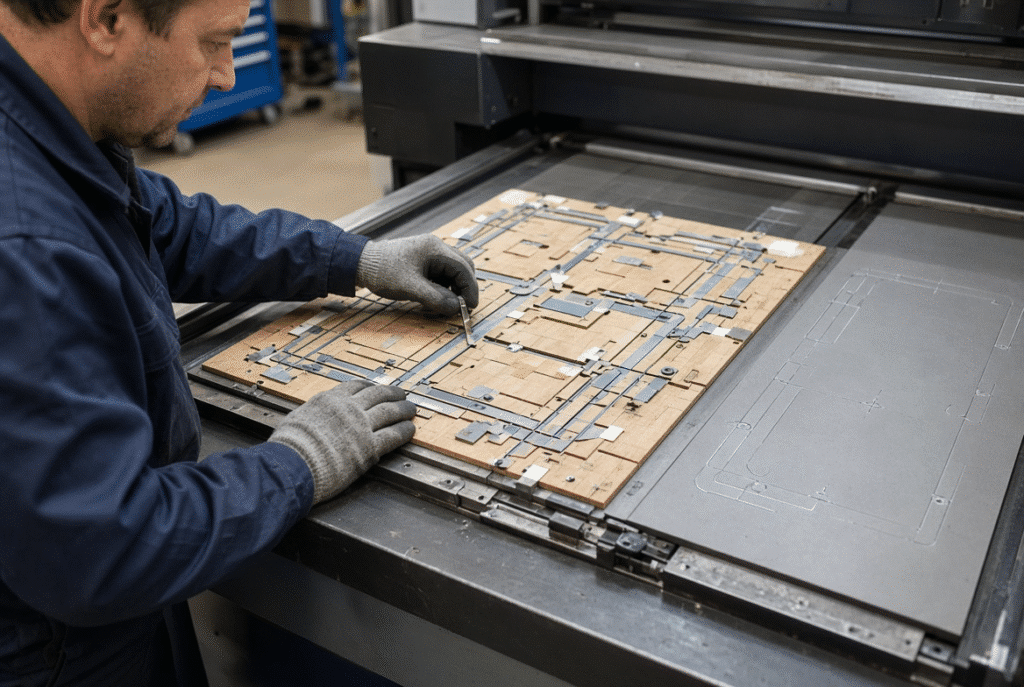
Make ready and counterplate condition control pressure distribution, cutting completeness, quality of creasing, flute compression, and face-sheet appearance. Do not over pack locally as this will just cover up deeper die or machine problems.
Set Cutting and Creasing Pressure
Pressure in the feeder is not the same as pressure of the die-cutting. Use pressure setting as a stage of its own.
Start with a Controlled Pressure Setting
Start with the suggested set-up instructions and apply pressure slowly. The trial must verify that it has been cut completely, cut clean, removed waste properly, no crushing of the flutes and no visible damage to the face-sheet.
Check for Underpressure
Check for unfinished cuts, uncut corners, weak slots, lack of waste separation and variation in the sheet. Before increasing pressure, check the pressure distribution, board thickness, make-ready and rules on the die.
Check for Overpressure
Look for surface dents, pressure marks, crushed flutes, deep creases, face-sheet deformation, loss of board stiffness/folding issues, and excessive machine loading. The higher the pressure the more it can aggravate the problem.
Check Pressure Across the Working Area
Inspect large sheets of centre, edges, corners and complex die areas. Variation can often be attributed to any of the following: machine parallelism, make-ready quality, condition of the mold, support, or thickness variations in the boards.
Run a Controlled Trial
The trial should be recorded, adequately structured, and sufficiently extended to show repetitive defect.
Start at a Conservative Speed
Operate a small amount at a regulated speed. Check sheet separation, lead edge arrival, skew, surface contact, registration, cutting, creasing and delivery behaviour.
Inspect the First Trial Sheets
Inspect printed surface, registration marks, die cut lines, creasing lines, sheet edges, flutes, cutting completeness, waste removal, curl and delivery alignment.
Change One Setting at a Time
Never change feeder pressure, the position of the gauges, die pressure, and machine speed at the same time. Note each change and its impact on multiple sheets.
Increase Speed Gradually
Increase production rate after stabilisation at the current production rate. Look out for missed feeds, skewing, surface marks, movement of the surface, jamming, incomplete cuts, and delivery instability.
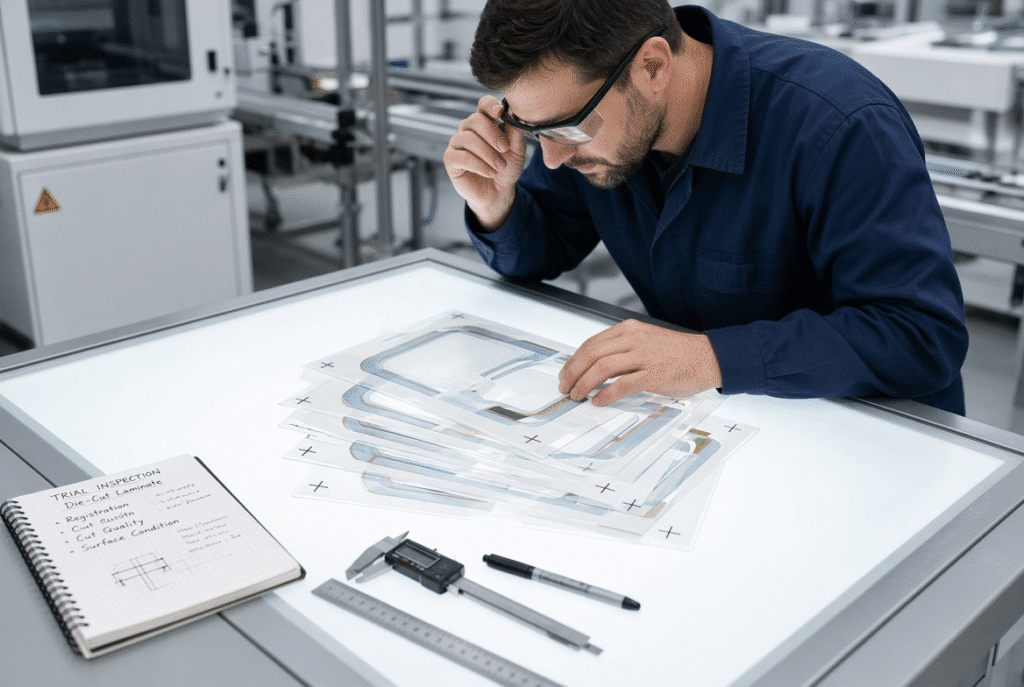
Check Registration, Surface Quality and Die-Cut Results
This is the stage before the product goes into full production, in which the quality is checked.
Check Print-to-Die Registration
Compare print marks, edge of sheets, die cut marks, windows, handles, slots, creasing lines, front margins and side margins. Differentiate between consistent offset and random variation.
Check Printed-Surface Protection
Check for scratches, scuffs, ink transfer, pressure marks, gloss changes and film or coating damage on the face sheet. The point of contact is often determined by the position and number of marks.
Check Cutting and Creasing
Check for complete cuts, clean creases, good folding characteristics, no crushed flutes, no face sheet damage and uniformity throughout the working area.
Check Waste Removal
Review waste bridges, stripped areas, need for manual intervention, incomplete cuts and damaged finished blanks.
Check Curl and Flatness
Curl can be caused by many different reasons such as lamination tension, moisture, pressure imbalance, board warp, and die setup. Check for flatness prior to approving delivery section.
Adjust the Delivery Section
The delivery is part of the set-up process and can cause sheets to be damaged and/or misaligned after they exit the die-cutting area.
Set Delivery Guides and Side Joggers
Adjust the stack alignment, guide position, side-jogger pressure, sheet drop height, and handling of the heavy board. If the side movement is too great, it will rub the printed surface or cause the stack to move.
Set Blower or Air Assistance Where Applicable
If the machine has air assistance, do the same: level sheets but without blowing them out of place. Too much air will upset the stack, too little will decrease levelling.
Check Delivery Stack Alignment
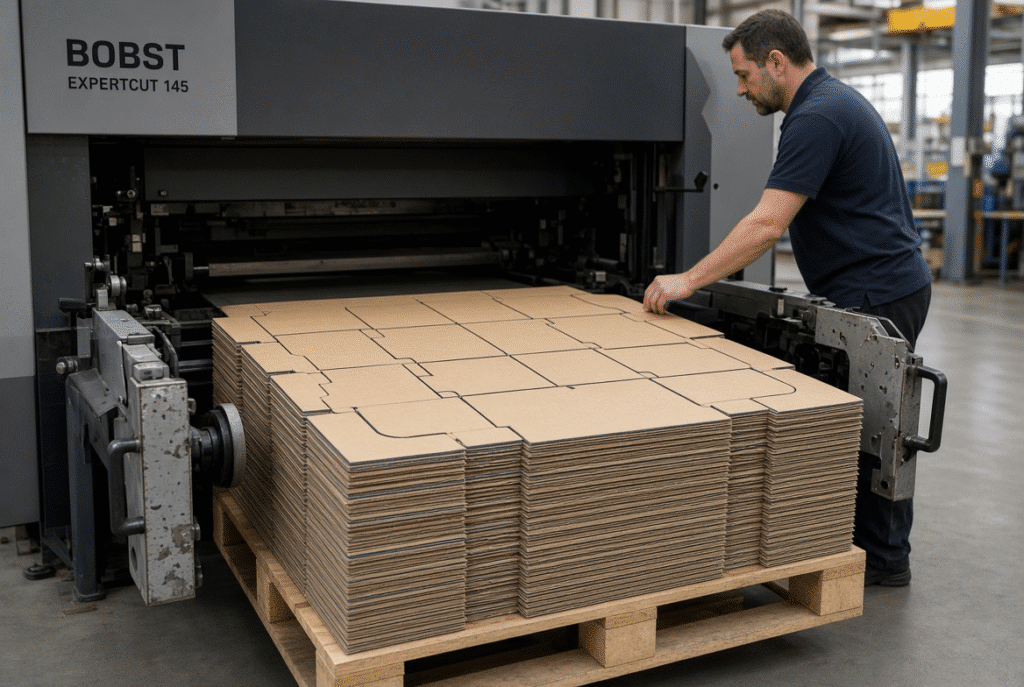
Check front edge, side edge, flatness of the stack, rubbing between sheets and orientation of finished blank. Delivered die-cut sheets may be damaged or misaligned even with a clean die-cut sheet.
Inspect the Finished Stack Before Approval
Before submitting to production, inspect a representative stack for such defects as scratches, curl, edge damage, registration, cut quality, and alignment.
Troubleshooting Setup Problems
Apply the following practical connections to symptom, probable cause and first check.
Surface Scratches or Pressure Marks
Out of alignment wheels, worn wheels, high contact pressure, contaminated belts, transfer points or delivery rubbing.
Print-to-Die Misregistration
Sheet skew, Board warp, Wrong gauges, Lamination movement, Printing variation, Timing, or Die alignment.
Incomplete Cuts
Any or all of the following rules are worn, insufficient pressure, uneven make-ready, variation in thickness of the board, machine parallelism, or die orientation error.
Crushed Flutes or Damaged Creases
Too much pressure, make-read preparation incorrectly, improper crease setup, compression of the board, or improper materials.
Face-Sheet Lifting
Poor lamination, edge damage, curl, too much contact, over pressure or poor material condition.
Delivery-Stack Problems
Guide alignment, side-jogger settings, drop height, sheet curl, blower settings, or sheet to sheet rubbing.
Document and Standardize the Setup
Setup records enhance repeatability & reduce changeover waste.
Record Material and Job Data
Board thickness, flute type, sheet size, surface finish, lamination type, warp, die number, cutting/creasing requirements, target speed and requirements for finished product.
Record Machine Settings
Feeder pressure, guide positions, front/side gauges, sensor positions, die pressure, make-ready details, delivery settings, and trial results.
Record Defects and Corrections
Surface marks, registration variation, jams, incomplete cuts, waste problems, curl and delivery problems. Records enable operators to use them again without needing to remember settings.
Define Approval Criteria
Confirm surface qualities, registration, cutting, creasing, waste removal, flatness, stack quality and finished assembly prior to production. Avoid using universal numerical tolerances.
Selecting a Flatbed Die Cutter for Laminated Corrugated Board
Do not judge a machine on the basis of claims in a brochure alone; evaluate it based on actual laminated material, requirements for the die, the surface requirements, and the production conditions.
Information to Provide the Supplier
Board thickness, flute type, single or double wall, sheet size, surface finish, lamination type, typical warp, die-cut size, creasing requirements, registration target, target speed and finished product samples.
Questions to Ask the Supplier
What are the grades of laminated boards used? What is the protection of printed surfaces? Which part(s) make contact with the face sheet? What are the way control of front and side positions is achieved? What make and ready changes can be made? What is done about moderate warp? What is the content of the messages delivered? What was the representative material’s steady speed? What training as an operator and installation does there exist? Are there any spare parts and technical support available?
Reference the DAIS D1060Y Naturally
One choice, the D1060Y lead edge feeding flatbed die cutting machine is for paperboard and corrugated-board. The suitability of the particular lamination board should be verified by representative material testing and inspection of the final machine configuration.
Frequently Asked Questions About Flatbed Die Cutter Setup
What should I check first when setting up a flatbed die cutter for laminated board?
Determine board condition, lamination bond, sheet size, warp, surface quality, flute type, die layout and finished product requirements prior to setting the pressure.
How can I prevent scratches during feeding?
Maintain clean wheels, guides, belts and support surfaces and delivery parts. Employ controlled contact pressure, proper alignment and a short trial with real laminated samples.
How do I maintain print-to-die registration?
Make a consistent stack, control lead-edge arrival, adjust front and side gauges, check skew and timing, compare printed marks with die-cut features on various sheets.
How much die-cutting pressure should laminated corrugated board use?
Avoid a universal value. Pressure is influenced by factors such as thickness of the board, flute structure, die condition, make-ready, rule condition, machine parallelism, cutting requirements. Release it slowly from recommended instructions.
Why are the flutes crushed during setup?
These can be caused by: too much pressure, improper make-ready, die or crease set-up, variation in board thickness or lack of machine parallelism.
Why is waste removal difficult?
These can be due to incomplete cuts, stiff board, narrow waste bridges, die layout, not stripping well enough or too much variation in board.
Should I run at full speed during setup?
No, start at a managed speed, check several sheets and then slowly ramp up when you find that feeding, registration, cutting, surface and delivery quality is consistent.
What should I provide for a machine test?
Submit real laminated board, sheet size, flute, thickness, surface finish, typical warp, die requirements, target speed, registration criteria and samples of the finished product.
Summary Guidance – Set Up from Feeding to Delivery
A reliable flatbed die cutter setup for laminated corrugated board starts with the complete sheet path, confirming the material and job, inspecting the lamination and surface, preparing the stack, cleaning and inspecting the feeder, setting feed wheels, guides, gauges and support, installing and inspecting the die, setting make-ready and pressure, running a controlled trial, checking registration, surface, cutting, creasing, waste and curl, adjusting delivery and stacking, documenting the approved setup, and testing the actual machine and material before full production.
The D1060Y lead edge feeding flatbed die cutting machine is a practical starting point for technical discussion for plants that are evaluating equipment and/or refining laminated-board changeovers. Submit the actual laminated samples, sheet sizes, flute type, surface finish, die requirements and product quality goals to DAIS to verify the configuration under actual production conditions.