

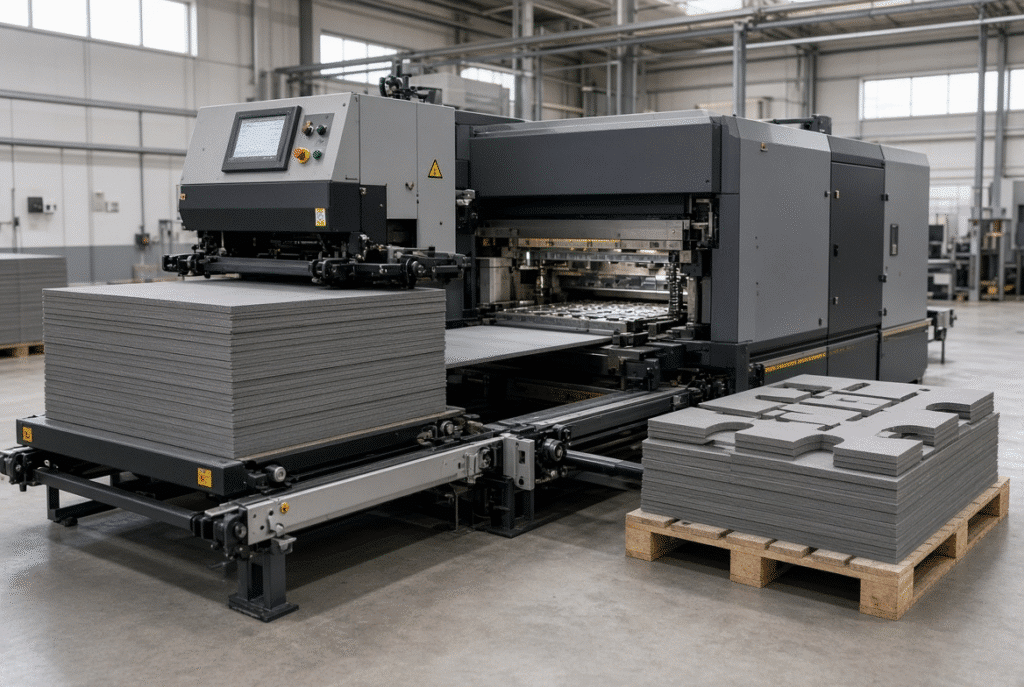
If the die and board thickness are not compatible with the machine, or if the board thickness or density is not compatible with the board format, cutting layout, and finished product requirements, then grey board die cutting will not work. Grey board: a dense paperboard, usually from reclaimed fibres, often referred to as greyboard or chipboard. It is heavier and stiffer than most corrugated board of the same thickness, and it also has a different compressibility, which affects the way of separation in the feeder, the pressure applied in the die and the way waste leaves the die after the cut.
While a high machine pressure rating is not necessarily a good indicator of equipment suitability for all grey board applications, it is certainly a desirable characteristic. The result is influenced by density, caliper, surface finish, edge condition and die design. When using grey board as simple paperboard or corrugated, it will often result in incomplete cuts, crushed edges and/or difficult edge removal. The best way to do it is to measure the actual board and modify the full process accordingly.
What Is Grey Board?
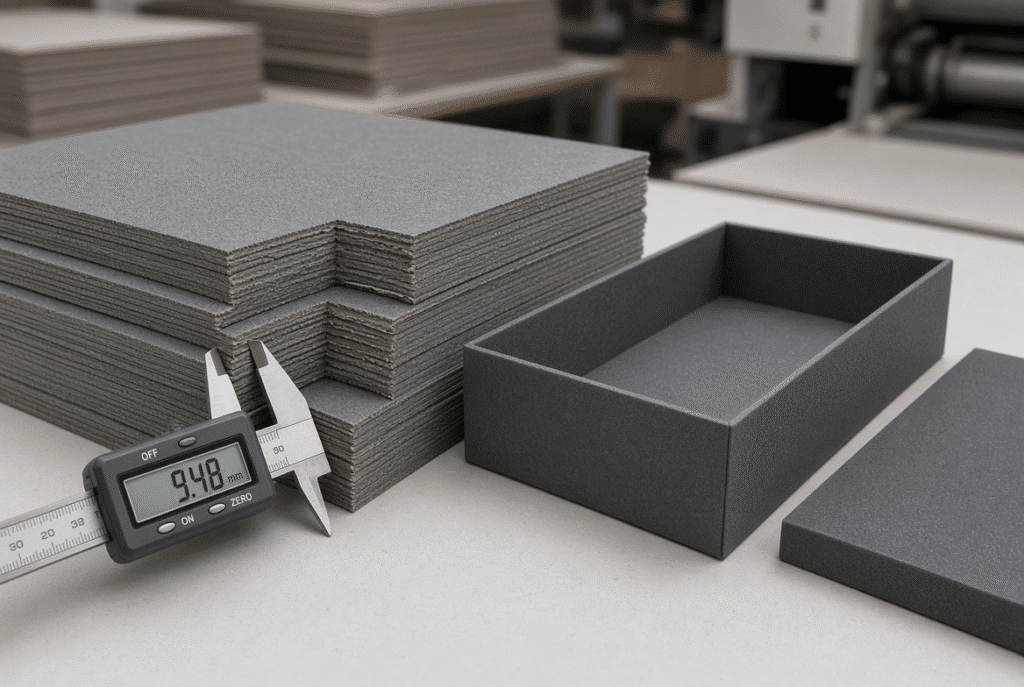
Grey board is a compacted paperboard that is primarily composed of recycled paper fibres. The colour is typically gray for the entire thickness, but can be coated with surface colours, laminated, or wrapped with printed colours. There are variations in composition and density among the various mills and grades, and as such the same nominal size can respond differently than the other.
Common Grey Board Applications
Grey board is used as the underlying structure in many rigid products:
- Rigid boxes, set-up boxes that require clean corners and high stiffness.
- Books with covers and case-bound books.Case-bound books, book covers.
- The files, folders and stationery elements.The components of files, folders, and stationery.
- This is a point of sale display and structural insert.
- Puzzle pieces and game pieces
- The backing boards and packaging inserts are both made from these materials.
- Paper-based objects that need to be very heavy or have very specific sizes
In both, the final product should have all the external features correct, cut edges clean, controlled creases with folding and even flatness. These requirements are immediately apparent if the boards vary in thickness or density.
Grey Board Density, Grammage and Caliper
There are three measurements that are easily confused:
- Grammage is the mass per unit area (g/m²).
- Thickness (mm or microns) is Caliper.
- The first two are related through density which is mass per unit volume.
For two boards of very similar grammage, the two boards will be able to cut and crease differently if one board is thicker and less open, and the other is thinner and more open. The density will have an impact on cutting resistance and compression of the board under the rule. Guide clearance, die entry and crease channel depth are measured by Caliper. The cutting effect is not determined by only grammage.
Surface and Edge Characteristics
Grey board surfaces are relatively smooth to fibrous and open surfaces. Some sheets are supplied laminated or coated on one or both sides, some not. Edges may be straight and unblemished or dusty, slightly delaminated or irregular when cut. These surface and edge conditions affect feed-wheel grip, friction against guides, quality of cut edge and ease of waste pieces separation. Over a prolonged period of time, dust or loose fibres can also get into the die and counterplate.
Material Properties That Affect Grey Board Die Cutting
All properties of a grey board will have an interaction with the feeder, the die and the pressure system.
Thickness and Compression
The thicker the board, the more guide clearance and sheet support is required. If the cutting rule is placed inside the board, it causes compression of fibres before the last cut. Controlled compression is normal and is used to get a clean edge. If compression is too great, however, then the edge could be crushed, the finished product could have a permanent dent or the stiffness could be reduced. A board that could easily be cut at 1 tonne might only be showing signs of damage at 2 tonnes.
Density and Cutting Resistance
The higher the density of the board the more it will resist the cutting rule. Thus it is clear that the required pressure depends on the density, but it never depends entirely on the density. In addition to the machine parallelism and die geometry, the rule condition and make ready are responsible. Even if applied to high pressure, an incomplete cut will be obtained from a dense sheet having a worn or poorly levelled die.
Stiffness and Sheet Handling
Grey board is hard. Thin sheets can bend or lift in the feeder; thicker or denser sheets will tend to get stuck in narrow transitions or at inadequate clearance locations. Stiffness has an impact on the sheet settling against front and side gauges, as well as on the sheet’s behavior under the gripper or lead-edge system.
Moisture and Dimensional Variation
Moisture content varies as affected by the environmental conditions during storage. Moisture absorption or loss will cause boards to bow, curl, and/or slightly change caliper. This is true even for a dense sheet. Always check material from the production batch and not assume that all pallets are alike!
Surface Finish and Printed or Laminated Faces
Coated, printed or laminated faces alter the coefficient of friction and risk of marking. Untreated grey board may be acceptable for feeding wheels if they won’t leave marks or polish the laminated face. Boards may have a reverse side that is not the same as the face side and both sides must be taken into account when determining contact pressure and guide surfaces.
Feeding Grey Board into a Flatbed Die Cutter
Material properties start to manifest themselves as problems the first time they are fed.
Stack Preparation and Sheet Weight
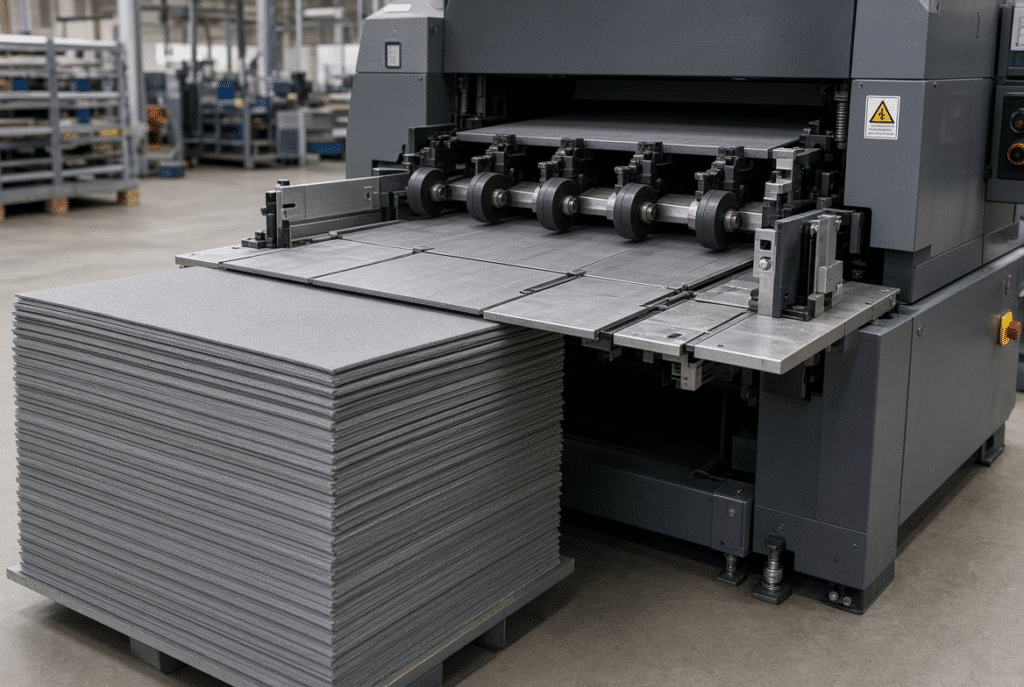
Make sure that the stack is positioned correctly. The feeder drive is subjected to an additional load when the heavy sheets are used for separation. Misfeeds occur long before reaching the die due to damaged corners, different sizes, dust or intermixed warped sheets. Do not overfill the machine and discard any curred or damaged sheets at the edge.
Feed-Wheel Contact and Surface Protection
Feed-wheel pressure should be sufficient to ensure good movement of the sheet, but not so great as to cause marks on the printed or laminated face. The balance is affected by the material of the wheels, the amount of wear and the condition of the surface on which the wheels are rolling. Too much pressure will polish or indent the board, too little pressure will give slips and skew.
Sheet Support and Guide Clearance
Thick grey board sheet will catch and tilt or jam when it is left unsupported across a gap or when it butts against a clearance set for thinner board. The required guide clearance should be equal to the actual caliper, plus a slight tolerance for thickness fluctuations. Positioning surfaces on front and side must be clean and parallel to ensure the sheet registers the same time each time.
Warp, Curl and Sheet Squareness
Even high-density grey board can bow, curve or twist following climate change and/or storage. A slightly out of square sheet will add up to registration error over the die area. Inspect the actual production batch for both squareness and flatness prior to the first set up.
Controlled Speed During Setup
Start at slow, steady pace. Ensure that sheet separation, transport, front and side registration, and entry into the die are stable before speeding up. A dense sheet that feeds moderately well can cause issues if the feeder timing and/or support are not adequate at higher rates.
Choosing the Right Die for Grey Board
A pressure will never make up for an unsuitable die. The most important variable in grey board is the design of the die.
Cutting Rules and Rule Height
The height, condition and geometry of the board should be appropriate for the thickness and type of counterplatte system. Any worn, damaged or improperly sized rule will produce incomplete cuts no matter how much pressure is applied. Also layout density is important – a lot of rules in close proximity focus force and can lead to over stress of dense board.
Creasing Rules and Folding Requirements
The creasing process is not a cutting process. The thickness, density, fibre direction and fold geometry of the crease need to correspond with that of the board. One of the most common design differences between a rigid box panel and a regular flat insert is the type of crease treatment. The actual corrugation height and width for channels must be different from the corrugated-board die, and should be determined by the product being used.
Die Layout and Waste Areas
The heavy and multiple solids of waste materials, small bridges and spaces are much harder to maneuver with a tight board. The layout has an impact on the pressure needed and the force required to remove waste. Multiple small cut-outs in complex shapes make it more likely to have spots that are left out and need to be cut or stripped by hand.
Die Condition and Maintenance
Prior to increasing pressure, examine the entire die. The same defects as the operator is usually complaining about “not enough pressure” will occur if rules are worn, damaged, crease rules are loose, contaminated, or make-ready is uneven. First clean and then repair.
Setting Die-Cutting Pressure for Grey Board
The correct pressure is the lowest pressure at which a complete cut is made, without crushing edges or damaging the surface.
Start with a Controlled Pressure Setting
Start at the minimum suggested by the machine’s manufacturer for the board thickness used. Apply pressure gradually and sample full-sheet samples. Clean separation of each cut line with minimum edge compression is the goal.
Signs of Insufficient Pressure
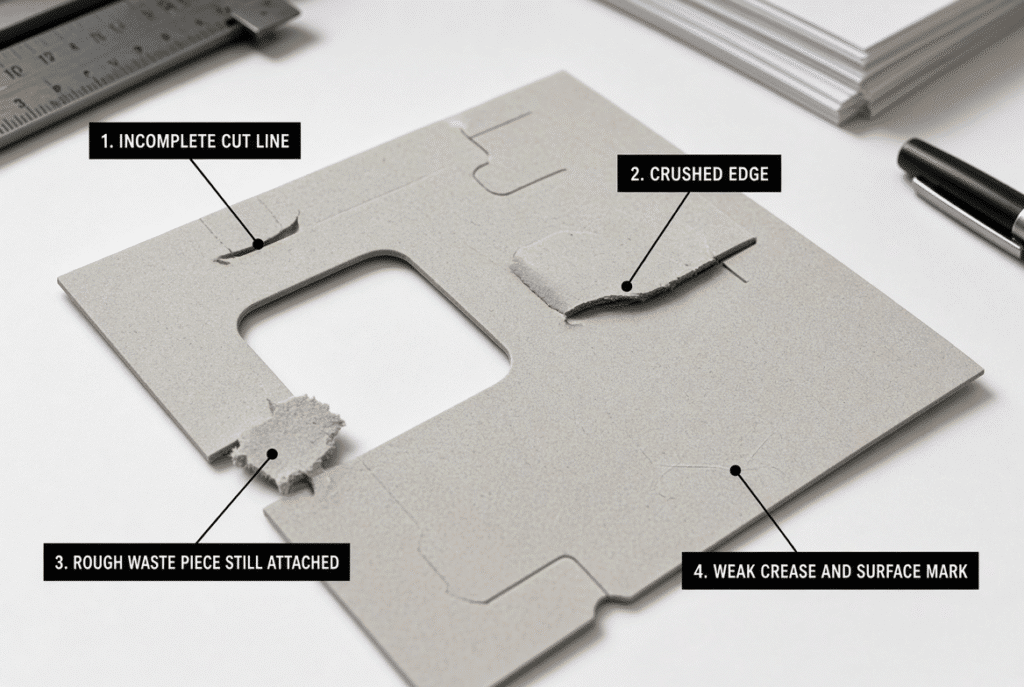
The typical signs are incomplete cuts, uncut corners, partial slots or holes, variation from centre to edge and waste that is not cut off. Worn rules, poor make ready, problems with machine parallelism and variation in board thickness can also cause these defects. When pressure is raised without die and make readiness check, it is likely to be a failure to meet the root cause.
Signs of Excessive Pressure
If the edges are crushed or flattened, if there are dents on the surface, if the board is permanently less stiff, if the make-ready is over-compressed, if the machine load is too high, or if the board is poorly folded or assembled, the pressure is too great. Increasing pressure usually doesn’t increase the quality of a worn or poorly levelled die, it’s simply a way to ruin the board!
Pressure Distribution Across the Sheet
Large-gray board sheets can exhibit distinct differences between centre, edges and corners. Inspect the entire die surface. Placing uneven pressure can be due to machine parallelism, die board condition, make-ready thickness variation or local differences in board caliper.
Creasing and Folding Grey Board
The cutting and creasing will be assessed individually.
Crease Depth and Folding Direction
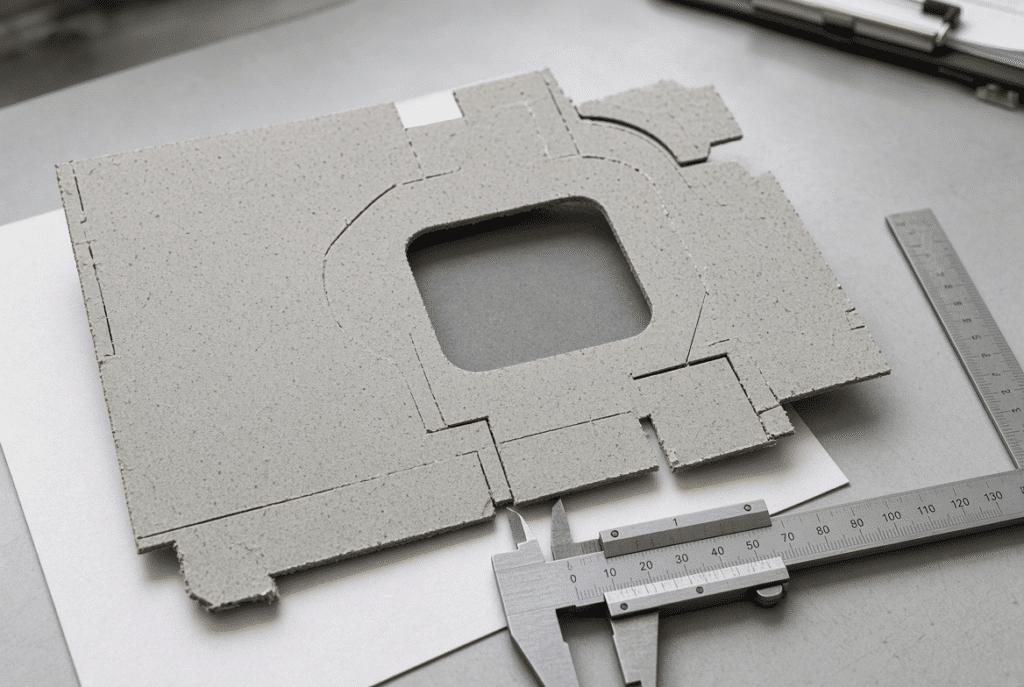
The performance of a crease is influenced by the thickness, density, fibre direction and direction of final fold of the board. The crease that is successful when the board is creased with the grain can crack or open when creased against the grain. Product geometry (rigid box vs simple insert) is also a factor in determining the crease profile.
Weak or Inconsistent Creases
Insufficient crease depth, incorrect crease channel geometry, pressure differences or board thickness differences across the sheet are usually indicated by the difficulty in folding, folds wandering from the intended line or by the panel movement and pressure needed for assembly.
Excessive Creasing and Surface Damage
If the crease is too deep, it crushes fibres, leaves a dent, strengthens the board, or will crack the laminated surface. Just because it’s deeper does not mean it’s better. The crease should only be strong enough to fold without causing damage.
Verify the Finished Product
Fold or assemble representative pieces. When considering rigid boxes, covers and displays, consider geometry, edge appearance, stiffness, fit and final dimensions rather than only quality on the flat blank.
Waste Removal and Finished-Edge Quality
A full cut is not guaranteed to be easy to strip or have clean edges.
Why Dense Board Can Be Difficult to Strip
Dense fibres, stiff waste pieces, narrow bridges and any incomplete waste that is still in it increase the stripping force. The amount of manual labor increases and the chances of damaging the finished component increases. Thus the layout and stripping system design is as important as the cut itself.
Clean Edges and Burrs
The rough edges, fibre pull-out, compressed edges and visible tearing are typically associated with rule condition, pressure, make-ready and board density. All four factors have to match in order to have clean edges.
Manual Waste Removal and Production Cost
Labour cost, throughput and consistency are all affected when stripping is a hand process. When considering a die-cutting system for grey board, waste-removal behaviour is as important as cut quality of the first sheet being cut.
Delivery and Stack Alignment
Stable delivery and careful stacking is required for heavy grey board sheets. If poor jogging or impact effects occur, they will indicate edges or affect registration for further processes. Stack alignment following die cutting is related to appearance and downstream handling.
Common Grey Board Die-Cutting Problems
There may be several different causes for any visible defect. The most common symptoms are correlated with the initial checks that an operator or engineer should conduct, as reflected in the table below.
| Visible Problem | Most Common Causes | First Checks |
| Incomplete cuts | Worn rules, uneven pressure, make-ready, board variation, machine parallelism | Die condition, full-sheet pressure map, caliper |
| Crushed or compressed edges | Excess pressure, narrow waste, unsuitable make-ready, guide restriction | Pressure reduction, die layout, guide clearance |
| Skewed or misregistered sheets | Stack alignment, feed-wheel contact, warp, gauge setting | Pile, feed wheels, sheet squareness, gauges |
| Surface marks | Dirty or worn feed wheels, rough guides, excess contact pressure | Wheel condition, guide surfaces, contact pressure |
| Difficult waste removal | Incomplete cuts, dense fibres, small bridges, die layout | Cut completeness, bridge design, stripping force |
| Weak or damaged creases | Crease-rule selection, pressure, board thickness, direction | Crease geometry, folding test, board caliper |
| Finished product does not fold or assemble correctly | Blank geometry, crease position, edge quality, stiffness | Full assembly trial, dimensions, crease location |
Incomplete Cuts
Dousing problems are typically caused by rule wear, lack of pressure or uneven pressure, local board thickness variation, poor make-ready and machine parallelism. If the cause of the pressure problem is not investigated, increasing pressure will not fix the problem permanently.
Crushed or Compressed Edges
Over pressurized, over compacted waste areas, wrong guide pressure and local board compression cause flattened edges and thereby less stiffness and appearance of the product.
Skewed or Misregistered Sheets
Registration will be influenced by the stack preparation, consistency from the feed-wheel, guide clearance, board warp, and timing of the front/side gauge. When forming a dense sheet, errors in alignment are magnified.
Surface Marks
Marks can be caused from dirty or worn feed wheels, rough guide surfaces, too much pressure on the guide and contaminated delivery belts, which are particularly noticeable on the laminated or printed faces.
Difficult Waste Removal
Hand stripping is inevitable because of incomplete cutting, stiff dense waste, narrow bridges and unsuitable stripping force. Pressure changes may not provide as much improvement as a redesign of the waste areas.
Weak or Damaged Creases
The creasing-rule height, channel geometry and pressure and board thickness must agree. The direction of folding and surface condition are also important.
Finished Product Does Not Fold or Assemble Correctly
All of these: blank geometry, crease location, edge quality and residual board stiffness should be checked by making a real sample. The use of a flat sheet inspection is insufficient.
Practical Grey Board Die-Cutting Setup Procedure
A sequence that can be repeated minimizes the time spent on trial and error.
Confirm Material and Application Requirements
Note actual board thickness, grammage, density (if available), sheet size, surface finish, visible warp, die-cutting shape, required creasing, waste layout and the purpose of the finished product.
Prepare the Stack and Feeder
Align the pile, set feed-wheel pressure for reliable movement without marking, check guide clearance against measured caliper, remove damaged sheets and start at controlled speed.
Inspect and Install the Die
Check orientation, cutting-rule and creasing-rule condition, make-ready, counterplate, waste bridges and starting pressure. Clear any contamination before the 1st sheet.
Run a Controlled Trial
Use conservative rate for processing several sheets at a time. Check feed stability, feed registration, feed cut completeness, crease quality, edge condition, feed waste removal, surface marks and delivery stack.
Verify Folding or Assembly
Fold or assemble representative pieces for final application. Inspect for fit, squareness, seam closure, stiffness and finished dimensions.
Record Settings by Board Grade
Log thickness, density, size of sheets, die identity, pressure, crease setup, speed, waste settings and quality results. Jobs in the future become quicker and more regular.
How to Select a Flatbed Die Cutter for Grey Board
Material and output considerations should be the basis for the selection of machines and not a single pressure number.
Information to Provide the Supplier
Provide minimum and maximum board thickness, grammage and density (if available), sheet size range, surface treatment, typical warp, die-cutting size and shape, creasing/folding requirements, waste removal expectations, expected speed, daily quantity and finished product samples.
Questions to Ask About Machine Capability
Question the grey board grades tested, the range of thickness and sheet-weight the feeder can handle, how the feeder deals with dense or heavy sheets, any available guide and support adjustments, distribution of pressure over large sheets, die and make-ready support, how waste-removal problems are solved, and whether operator training and sparing parts support is available, on similar board.
Request a Material and Die Test
Wherever possible, test the actual grey board, sheet size, die layout, surface finish and finished application. Consider the feeding, cutting, creasing, edge quality, waste removal, delivery, stable speed, and operator intervention and final product assembly all together.
Reference the DAIS D1060Y Naturally
One such piece of equipment for paperboard and corrugated-board converting is the D1060Y lead edge feeding flatbed die cutting machine. However, Grey board suitability should always be verified for the specific thickness, density, sheet format, die requirements, pressure and end machine setup for each job.
Frequently Asked Questions About Grey Board Die Cutting
What is grey board used for?
Grey board is the core material used in rigid boxes, book covers, file covers, display structures, packaging inserts, puzzle boards, backing boards and many other paperproduct applications that demand stiffness and dimensional stability
Is grey board difficult to die cut?
Thickness, density, die design, surface condition, machine conditions, die waste layout all play a role in difficulty. Thick or dense board requires a more careful setup than lighter paperboard, but is commonly processed upon matching the material with the machine.
Does thicker grey board require more die-cutting pressure?
The pressure is dependent on the board, the die, rule condition, make ready, machine parallelism and cutting layout. Just applying pressure can cause edges to be crushed or else overloading the machine without curing the incomplete cuts that are made for other reasons.
How should grey board be fed into a flatbed die cutter?
Make a square, flat pile, set contact with feed-wheel, match guide clearance with actual caliper, verify edge condition and test at controlled speed until registration and sheet path are steady; then move at full speed.
Why are grey board edges crushed?
The most common causes are excessive pressure, too tight of guides, improper die or make-ready setup, too narrow of waste areas, and local board compression. Generally, if edge quality is poor, the pressure and full setup need to be reduced.
Why is waste removal difficult after grey board die cutting?
All of the above are contributing factors to incomplete cuts, dense fibres, stiff waste pieces, small bridges, and inappropriate stripping force. More often than not it is better to increase cut completeness and redesign waste areas to reduce hand labour, than to increase pressure.
How can I improve grey board creasing?
Correlate creasing rule, crease channels to the measured thickness of the board being used and the direction of the folds required and check the result by folding or assembling actual board samples. Only make adjustments once the cut quality has been deemed acceptable.
What should I provide for a grey board machine test?
Give board thickness, gramme, density (if known), sheet format, surface finish, die, and crease requirements, waste layout, and finished product samples or drawings, with dimensions measured.
Summary Guidance – Match the Machine and Die to the Board
The secret to grey board die cutting is to consider board density, thickness, feeder settings, die design, pressure distribution, creasing and waste layout as one integrated system. Measure the actual thickness and density of the product run. Check surface, edge, flatness and moisture. Carefully make the stack. Set feeder guide clearance and contact for actual caliper. Select cutting and creasing parts that are appropriate for the board and the desired product. Increase pressure slowly and check all over the sheet. Inspect Waste removal and edge quality. Fold/reassemble representative pieces. Experiment on actual samples prior to the production run and document which settings work for each board grade.
The best way to assess equipment or to troubleshoot a tricky job is to use the real grey board and die and to work under controlled conditions. Depending on the type of board and sheet format and requirements of the finished product, DAIS technical teams can assist with the evaluation of the material and the machine set-up.