

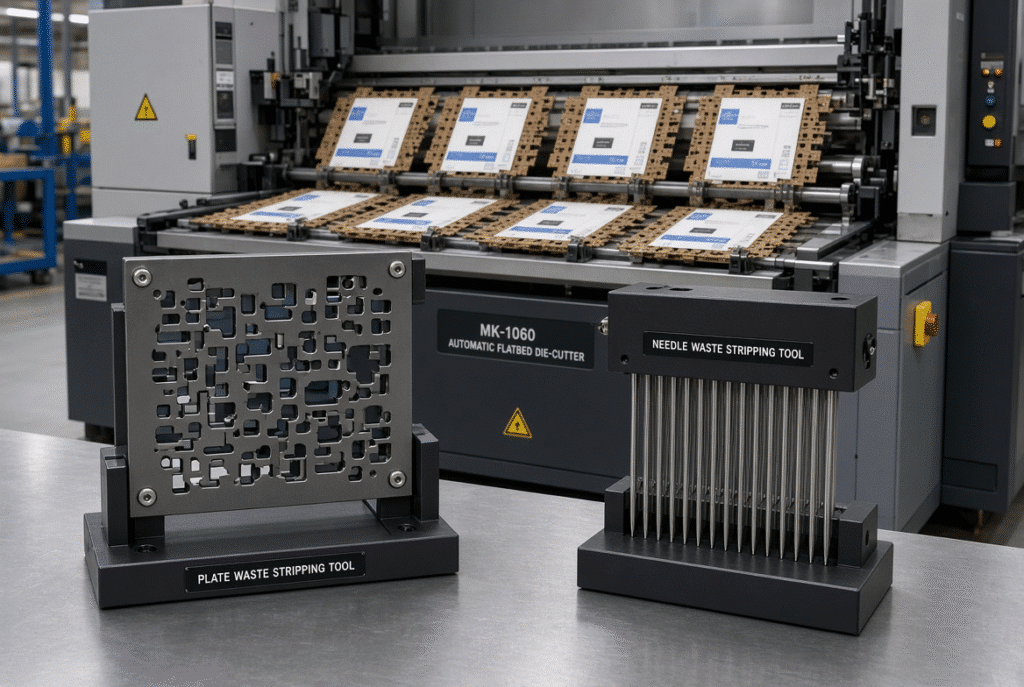
When looking at packaging manufacturers, the decision of plate waste stripping vs needle waste stripping is a practical one for those needing a clean separation of finished blanks after die cutting. Both systems take out material (outside skeleton, internal windows and waste between products), however using different approaches to the tooling. It all depends on your die layout, internal waste pattern, substrate, run length and job change frequency. Only choosing a machine by model number or a vague statement of flexibility may result in strip not being completed or blanks being damaged.
One solution might be needed for a folding carton, with repeated inside windows, and another solution might be required for a short run product with varying locations of windows. The result is determined by how the tooling is designed, registered, adjusted and operated to suit the pressure and system label, rather than by any single system label.
What Are Plate and Needle Waste Stripping?
Waste stripping is performed after the Die-cutting Station. The die forms the shape of the product, the creases, and the openings, but not necessarily cutting through all the unwanted board. The outer waste skeleton, the internal waste and the material between several blanks in a single sheet are removed when stripping. Clean separation ensures downstream folding, gluing, inspection and packing.
The Role of Waste Stripping After Die Cutting
Unfinished blanks still contain waste in folding-carton manufacture that can block the conveyors or tear the edges or cause the operators to remove material by hand. The goal of automatic waste stripping is to provide clean finished blanks for the next process. The tooling should only be touching the waste areas and not damage the surface of the product. There are several different contact requirements, such as outer waste, internal windows, handle openings, and waste bridges.
Plate Waste Stripping in Simple Terms
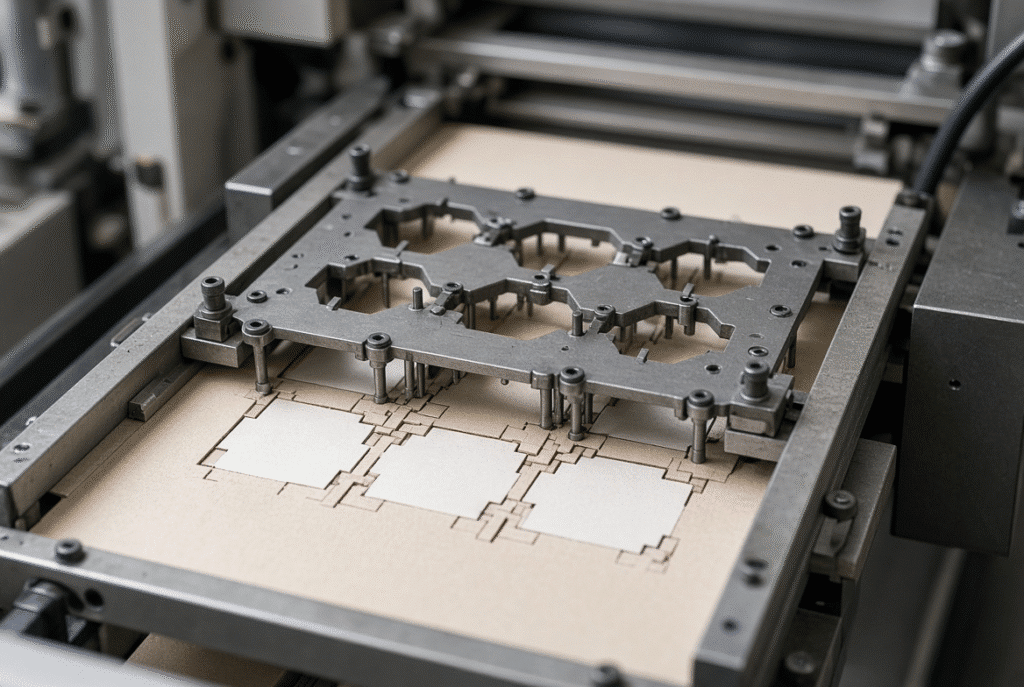
A plate-type stripping tool is a tool that has a set of plates or shaped surface with a set of force applied on the selected waste zones. It is designed to match the die layout so that the pressure is applied to the waste, while the finished blank is supported and/or avoided. Proper alignment with the die, support and registration is critical. Whether or not plates are suitable isn’t about assuming they’re only suitable for simple products, it’s about the actual pattern of waste and tool design.
Needle Waste Stripping in Simple Terms
Needle waste stripping is achieved by the insertion or removal of individual needles or pins that are arranged in a way to strip off some sections of waste. Needles can be inserted, removed or moved as per different layouts. This flexibility isn’t necessarily the key to a shorter setup time or more successful outcomes. These requirements of accurate positioning, adequate support, and controlled force still apply. Needles can be misplaced or cause damage to finished blanks as much as a poorly designed plate can.
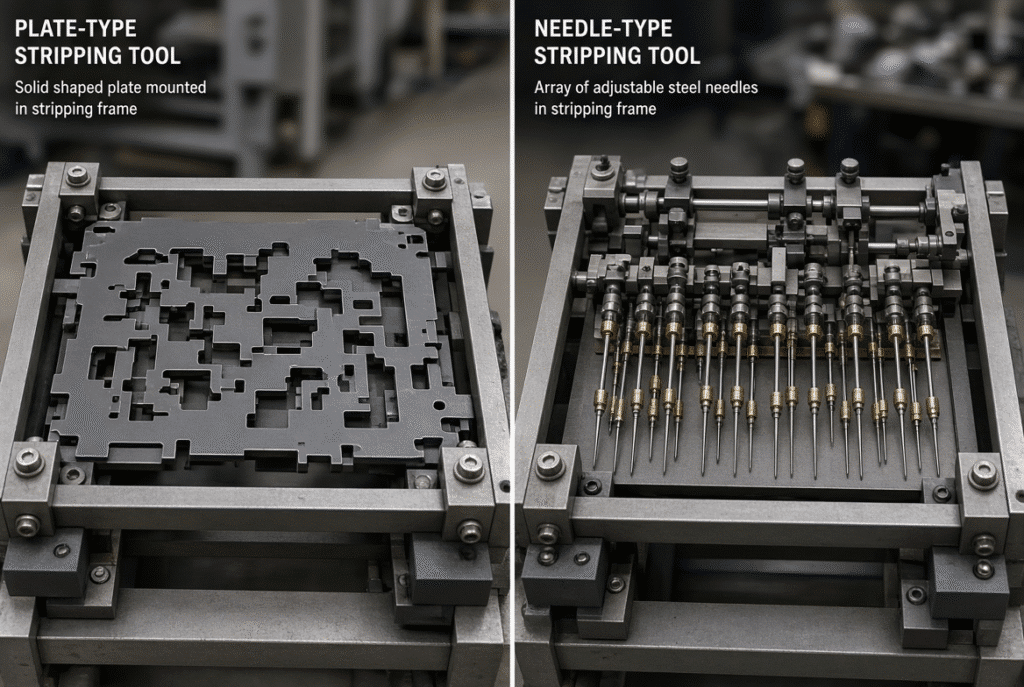
Plate Waste Stripping: Strengths and Limitations
When assessing plate systems, it needs to be evaluated against the real product and production time, not against marketing claims.
When a Plate System May Be a Good Fit
The stripping process may be appropriate for repetitive die configurations, consistent product shapes and known waste locations. A tool that reduces contact variations to medium to high volume runs of the same folding carton. If you get a job that will come up often, you can prepare a dedicated plate and the time will be spread out. When using a tool, never use it in production without using the actual substrate and die.
Potential Advantages of Plate Tooling
A well-designed plate ensures the defined contact area and the repeatable pressure distribution in the contact areas between the waste zones and the plate. As soon as aligned, it can be held stable for extended periods of identical work. This uniformity minimizes micro adjustments while in a shift, as long as the die and the registration is correct.
Plate-System Limitations to Consider
When new products are added, matching plate is required. Adjustment is more difficult when the location of the waste changes often compared to repositionable components. If the plates are poorly designed or misaligned, they may come into contact with the finished blanks, resulting in marks or damage to the edges. Plants also need to handle product-specific plates, as well as store and handle them. Flexibility is, therefore, dependent on the design of the tools and the production mix, rather than on the flexibility of the system.
Needle Waste Stripping: Strengths and Limitations
The operating characteristics of needle systems differ from those of the other systems and should be evaluated by the same practical standards.
When a Needle System May Be a Good Fit
Needle stripping may be helpful in situations where the internal waste positions vary from one job to another, when selective contact points are needed, and when complicated and variable waste patterns are found. When plants are required to make many short jobs or often change hole and window positions, repositioning needles may be beneficial. Final success will be based on availability of waste, substrate support, waste size and accurate positioning.
Potential Advantages of Needle Tooling
The force pattern can be re-established for various layouts by adjusting the contact points and changing the needles. This can help decrease the amount of time that a new tool has to be produced for each minor adjustment in the location of waste. If the operators record the positions of the needles carefully, it becomes easier to record the changeovers between similar products.
Needle-System Limitations to Consider
The more individual components, the more objects to set, tighten, and hold. This can cause damage to finished product surfaces from misplaced or worn needles. The set up time for complicated layouts can be longer because each needle should be set up properly. Correct support and alignment is still essential, even if a machine is adjustable, it does not mean it is fast or of high quality.
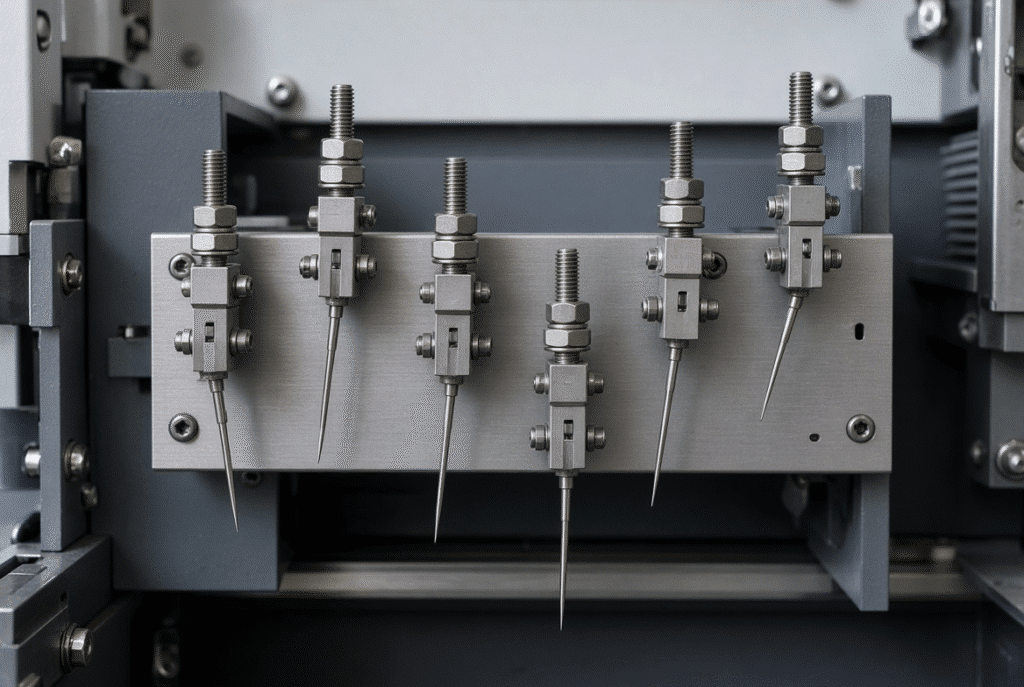
Plate vs Needle Waste Stripping: Key Comparison Factors
It is not a decision usually based on a particular system being “better” in itself. It is about the tooling principle that is best suited for the waste pattern, job mix and plant capabilities.
| Factor | Plate Waste Stripping | Needle Waste Stripping |
| Tooling principle | Shaped plate applies force to defined waste zones | Individual needles contact selected waste points |
| Best-fit waste pattern | Stable, repeating layouts with predictable positions | Variable or selective internal waste locations |
| Adjustment flexibility | Lower once plate is made; new plate for major changes | Higher; needles can be repositioned or replaced |
| Repeat-job suitability | Strong when the same layout returns frequently | Useful but requires documented needle positions |
| Short-run suitability | Can be slower if new plates are needed often | Often more practical when layouts change frequently |
| Setup requirements | Plate preparation, alignment, pressure check | Needle placement, tightening, documentation |
| Maintenance considerations | Plate condition, storage, occasional re-machining | Needle wear, replacement, position verification |
| Risk of product contact | High if plate design or alignment is poor | High if needles are misplaced or unsupported |
| Tooling management | Product-specific plates require storage space | Smaller components but more pieces to track |
| Dependence on die accuracy | High; plate must match die exactly | High; needle positions must match waste areas |
Product Geometry and Internal Waste
The choice is affected by windows, handle openings, small holes, narrow waste bridges, and blanks that are close together. The tool should not touch the finished blank but reach the waste. Avoid making judgments on the method based on the outside structure, and check the most troublesome inside structure first. The actual limitations of either system may be more apparent in the irregular contours and thin waste bridges than in the sheet layout itself.
Production Volume and Job Repetition
A stable plate setup can be warranted with recurring jobs. The short run is variable, and this may be advantageous for the ability to re-position needles. Take into account the real number of similar jobs per month, the average run length and returning of the same die. With proper and correct design & maintenance of the tooling, either method can be used in both environments.
Setup and Changeover Requirements
The plate changeovers include installing the proper plate, checking the alignment, making pressure adjustments, and conducting trial sheets. Needle changeovers require positioning, securing and verifying of each needle and confirming of support. The actual time will vary depending on the design of the tools, the skill of the operator, the complexity of the product and the accessibility of the machine. Take the overall measurement from removal, installation, adjustment, trials, inspection and correction, instead of a single stated measurement.
Substrate Type and Board Condition
Paperboard, coated stock, thicker board and selected corrugated applications are all different when it comes to stripping force/support. The quality of separation, and the marks the tool leaves on the surface depends on the flatness, stiffness, thickness variation, moisture content, and surface condition of waste. Test the actual substrate samples – same tool can perform differently on different grades of boards.
How to Choose the Right Waste Stripping System
Convert the comparison into a practical decision making process, beginning with the product and not the machine brochure.
Start with the Die Layout, Not the Machine Label
Start with the product drawing and die drawing. Determine outer waste, inner waste, waste bridges, product spacing, gripper edge and all regions where the stripping tool should not come in contact with the finished surface. A “with stripping” machine doesn’t indicate the type of tooling used in the machine, and doesn’t provide any detail about whether it is the same geometry as yours. Ask for technical drawings of the proposed stripping configuration and draw them side by side with your die.
Match the System to Job Repetition and Run Length
Production using multiple rejections of the same layout can be used to support dedicated or stable tooling. Adjustable positioning is typically best when products are variable and short production runs occur often. In the calculation account for the time and space necessary for storing and preparing tools. Instead of using a volume threshold, use the plants own production history.
Evaluate Setup Skill and Maintenance Capability
They require trained operators for both systems. There is a need for exact tool preparation and alignment for plate systems. Care and attention is required for placement, documentation and regular checking of tips and supports for needle systems. Verify that the selected method is reliable in terms of personnel, training schedule, spare parts and maintenance.
Confirm Machine Configuration and Included Accessories
Specify in writing whether the quotation covers any or all of the following: a plate stripping unit, a needle stripping unit, upper/middle/lower frames, plates/needles, supports, fasteners, storage accessories, installation, sample testing, operator training or spares. For machines like DAIS D1060Q, you can choose either plate or needle waste-stripping, but neither configuration is presupposed. Obtain a clear list of exactly what is supplied and what remains the buyer’s responsibility.
Common Selection Mistakes to Avoid
Choosing by “Automatic” Label Alone
The term “automatic” does not imply the type of tool, the range of adjustment, any accessories provided, or the type of product geometry the tool is suitable for. Ask for detailed configuration information, technical drawings and sample-test results prior to signature.
Comparing Tools Without Comparing the Die Layout
Even if the outer waste is cleaned by a system, the system can be broken on small holes or narrow bridges of the inner trash. Consider the most complex areas of the actual layout first. Side by side trials with no matching of the die geometry create false conclusions.
Ignoring Setup and Changeover Time
A quick-running process that needs to be prepared and aligned when a new job change occurs can be expensive to implement. Test the entire changeover operation under realistic conditions, such as trial sheets and inspection.
Treating Tooling as a One-Time Purchase
Plates and needles, supports and other related parts of the product are subject to wear and may need to be modified with changes in the products. Consider spare parts, maintenance, storage and future product development. Do not presume that the product lasts forever, but request maintenance instructions and replacement suggestions from the supplier.
Testing and Quality Checks Before Final Selection
The best way to compare plate and needle systems is still to perform the real sample test under representative conditions.
What Samples and Information to Provide
Use real pieces of substrate, thickness and grade of substrate, product drawings, die layout, sheet size, number of products per sheet, details of internal holes, actual production volume, desired production speed, current problems with manual removal of the products, and desired finished quality. When there is no information, recommendations are unsuitable.
What to Inspect During a Stripping Trial
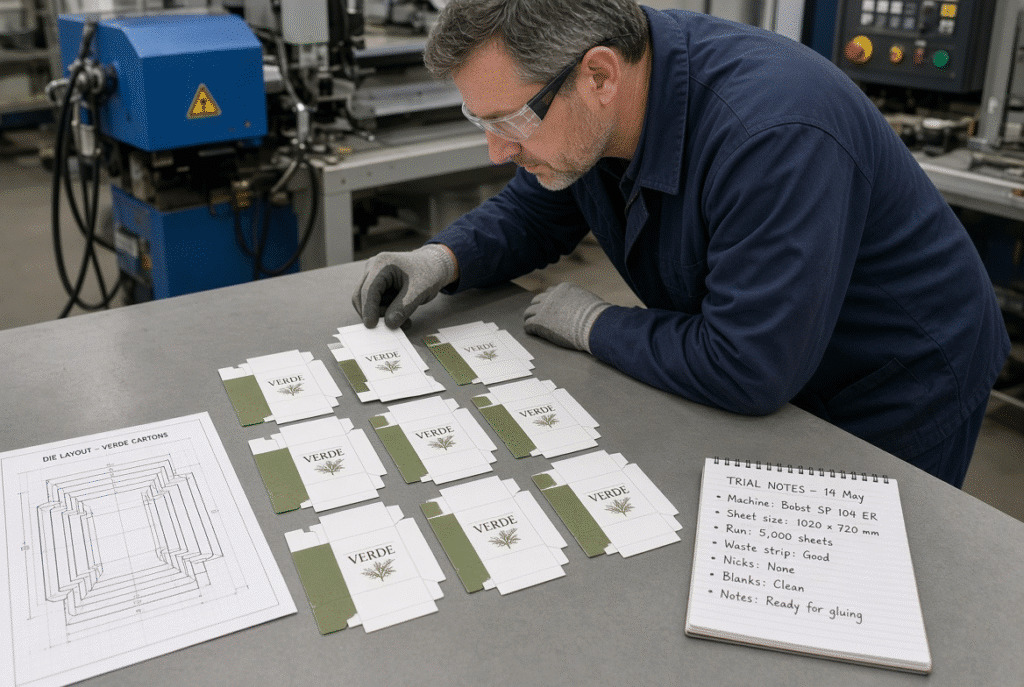
Insure full outer-waste removal; internal-waste; condition of product edges; surface marks; bent or damaged blanks; sheet registration; quality of delivery stack; set-up and change over; operator access and safety; repeatability from sheet to sheet. Don’t evaluate the method based on a single successful sample. Conduct multiple trials conducted under normal production conditions.
How to Record the Results
Record the tool used, substrate, machine parameters, setup time, number of operators involved, defects found, rework required, rate of stripping completeness and any limitations. Written trial records can offer a better basis for comparing suppliers and finalizing the machine configuration.
Summary Guidance – Choose the Tool That Matches the Job
A layout that has a defined tool that can consistently contact the correct waste area may be suited to plate waste stripping. When contact points are sought or when waste positions change, needle waste stripping may be beneficial for changing the adjustment. Both techniques should not be chosen without examining the die layout, substrate, run length, setup requirements and results of sample tests.
If you want to determine if plate/needle waste stripping is the correct solution for your application, submit your product samples, die layout, substrate thickness, sheet size, internal waste information, and projected volume to DAIS. Any general assertions about speed or flexibility have no meaning when a configuration is not specified that matches the actual job.